Filters and Bookmarks
Last updated: November 4, 2026
Find the inspections you need, then save a bookmark to return to the same view. Start with a simple filter below, or use AI filter to turn a plain-language request into filters.
These steps describe the web layout with a Filter button and an Actions menu. Notes for older layouts appear where the controls differ.
1. Find Inspections with a Simple Filter
Open Inspections.
Select Filter.
Type a field name, such as Project or Asset ID.
Select the field, then choose its operator and value.
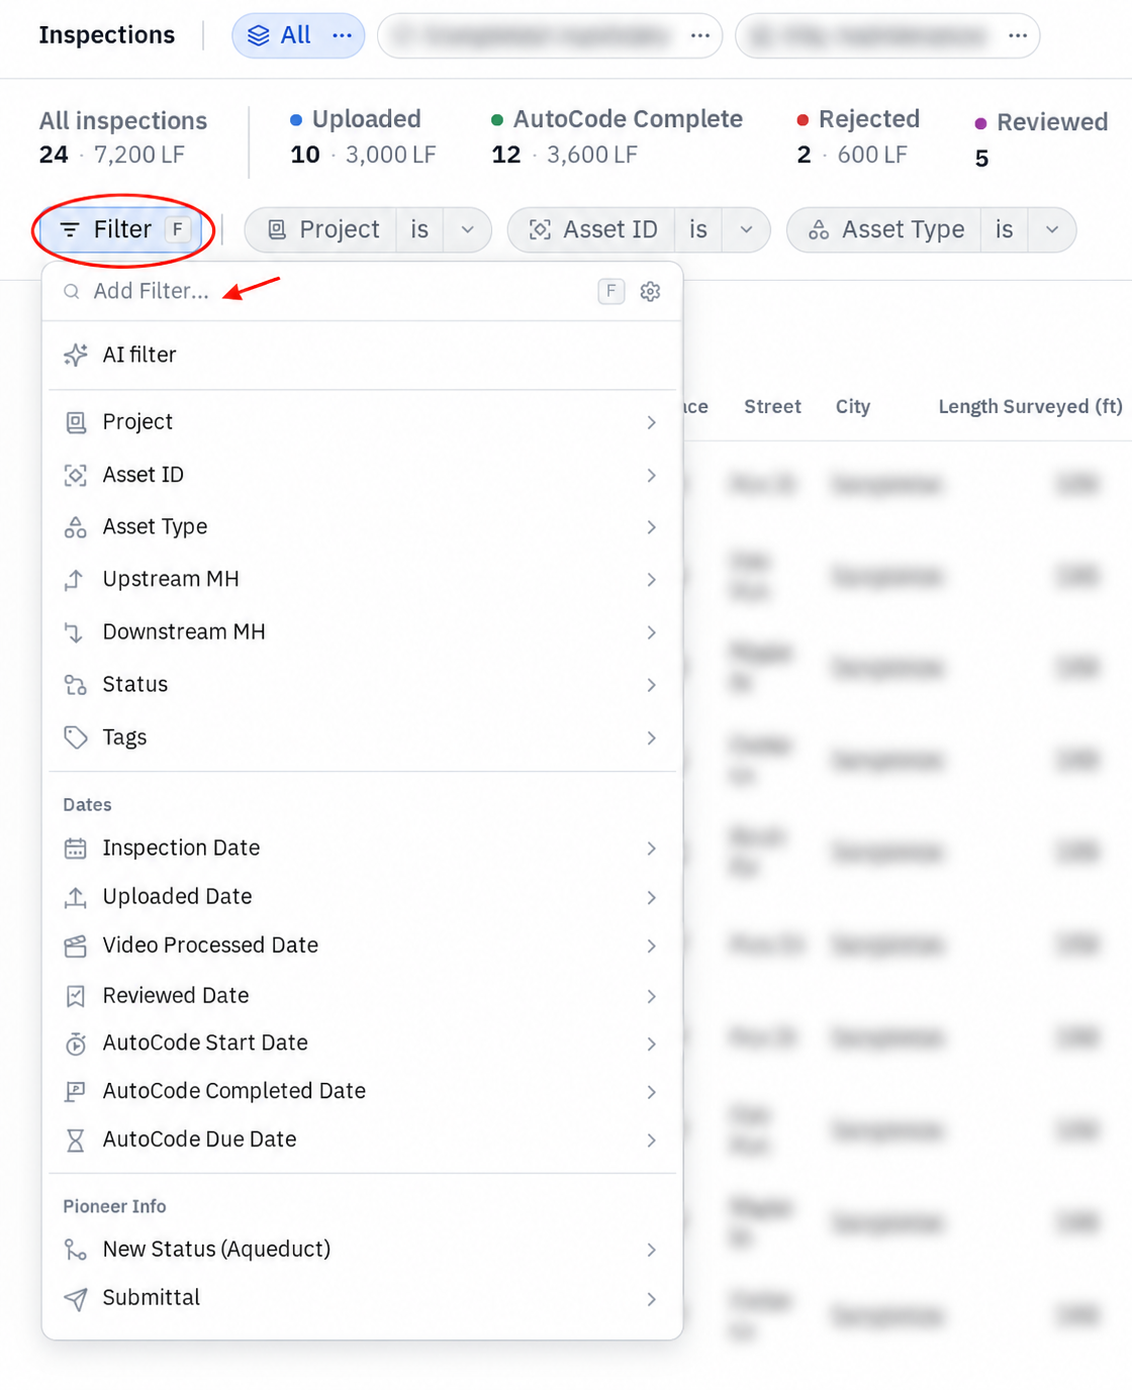
For a quick asset search, type the identifier and select Asset ID contains.
Add another filter to narrow the list. Select Clear to remove the filters. If your page shows individual filter fields instead, use those fields and the funnel icon for more options.
2. Choose the Right Date or Status
Inspection Date: the date in the inspection header.
Uploaded Date: when the inspection reached PIONEER.
AutoCode Completed Date: when AutoCode finished.
Status: the inspection's processing status.
Reviewed: whether the inspection has been marked reviewed; this is separate from processing status.
NASSCO Issues: whether validation issues are present.
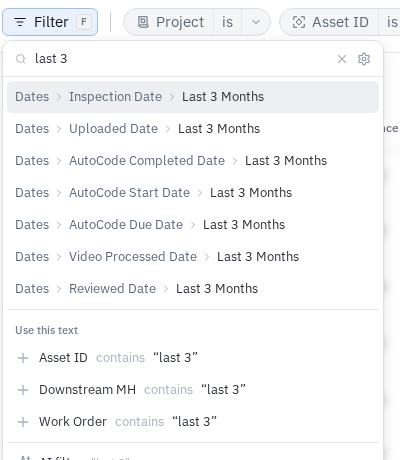
For a date filter, choose the date field, then the date range or preset you need, such as Last 3 Months.
3. Use AI Filtering
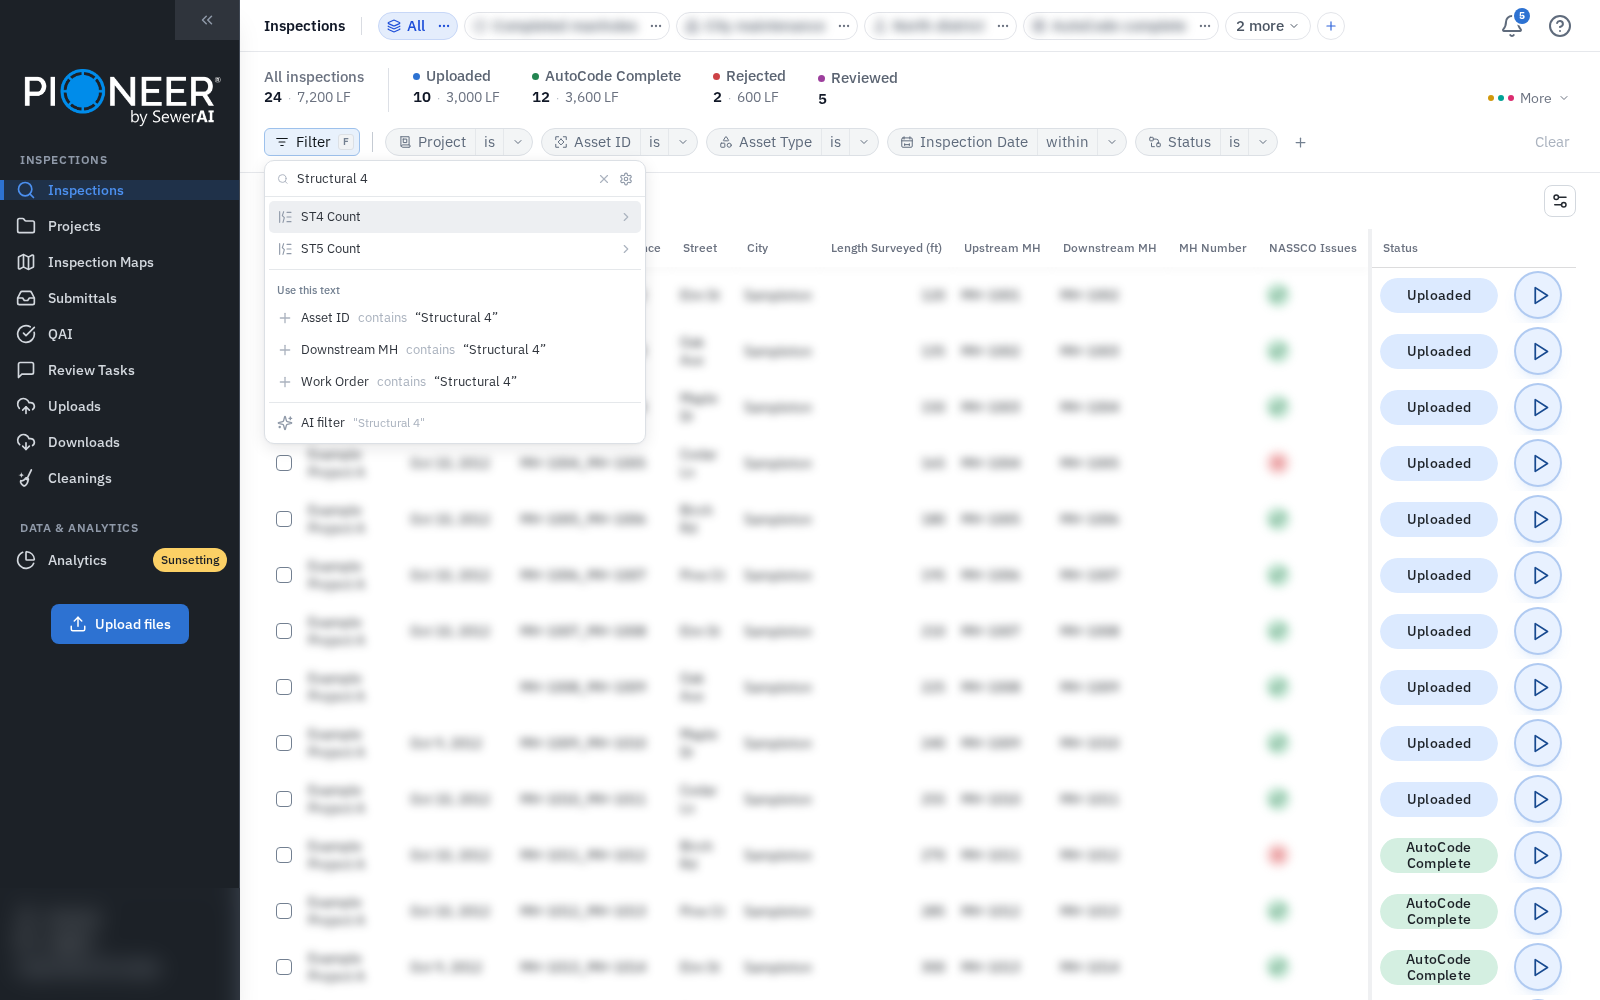
Instead of choosing each field yourself, describe the inspections you want in plain language. AI filtering turns the request into normal, editable filters.
Select Filter.
Type your request in the search box, describing the fields and values you want to filter by.
Select the AI filter suggestion that appears with your text.
Review the resulting filters. Check each field, operator, and value, including date ranges.
Correct or remove any filter that does not match your intent, then check the results.
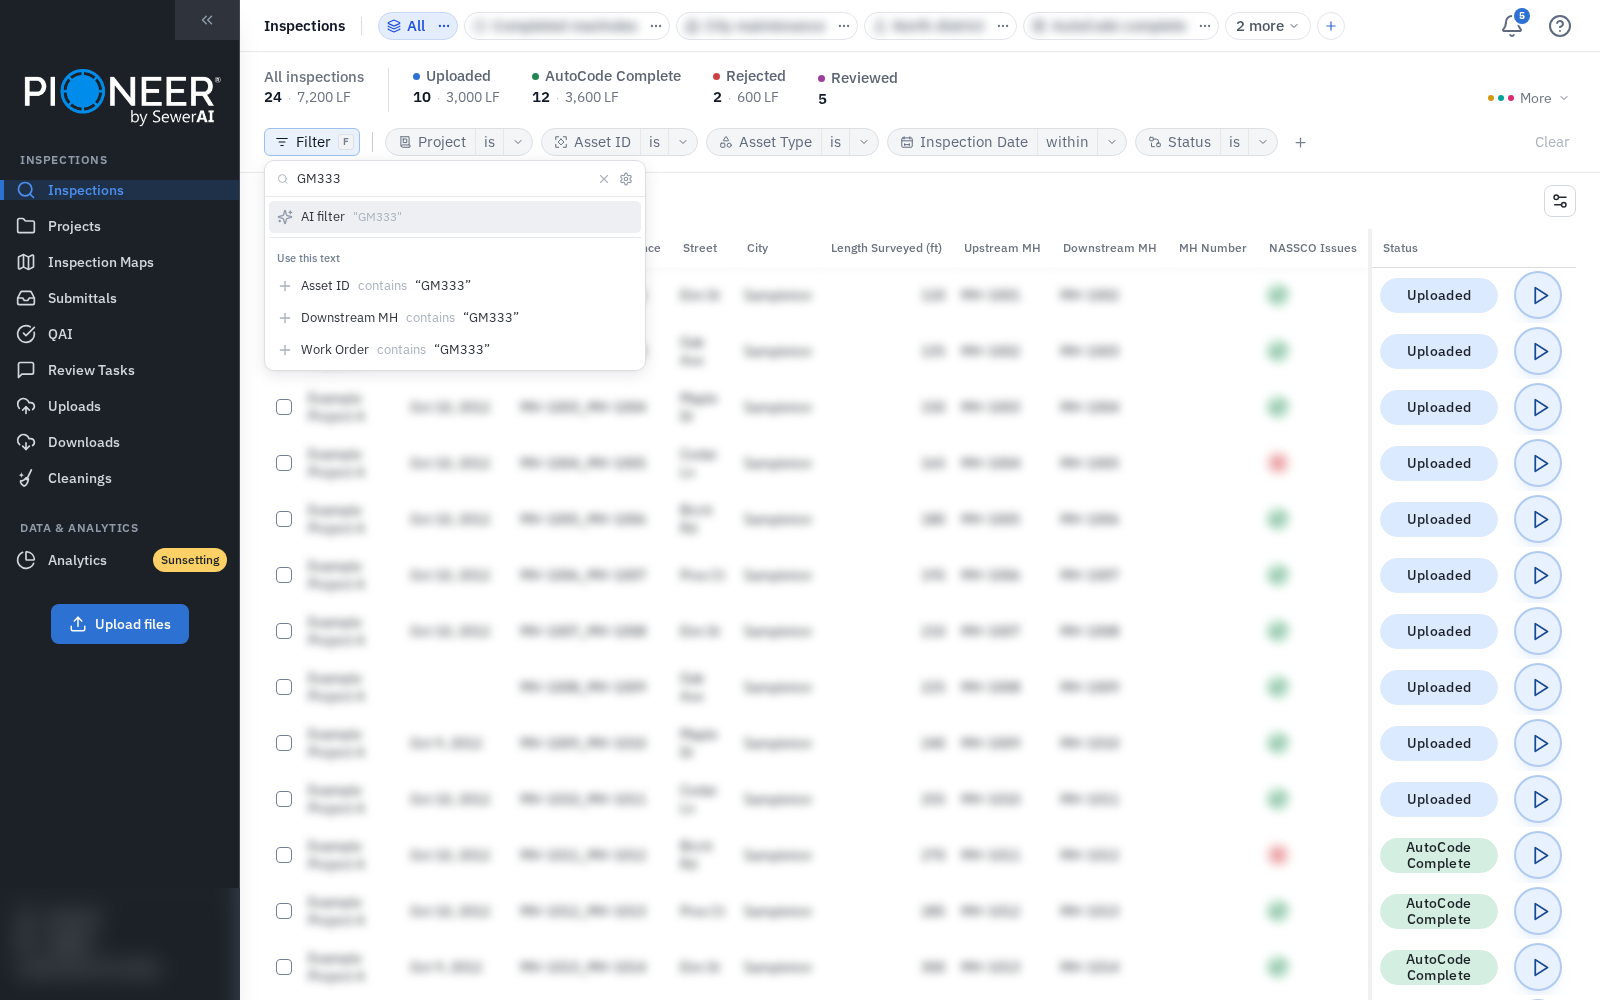
The screenshot shows where AI filter appears after typing. The Asset ID contains suggestion below it is a direct field filter, not the AI option.
Check the generated filters before using the results for a bulk action. If you see Could not apply filters from AI search, use the manual filter steps above. If AI filter is not shown in your layout, you can still select fields manually.
4. Save a Bookmark
A bookmark saves your filters, columns, sort order, and icon. It belongs to your user account and is stored on the server.
Apply the filters you want to keep.
Select the plus button beside the bookmark tabs.
Enter a name.
Select Save Bookmark.
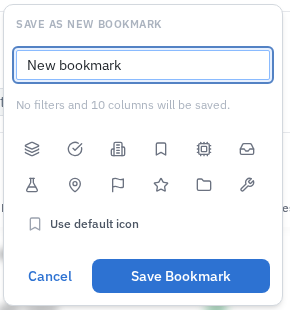
Select another view, then reopen your bookmark to check that its filters and results return. The matching inspections can change as data is added or updated.
If your page instead shows an Add Bookmark tab and a save icon, enter the name there and select the save icon.
Advanced: Combine Filters and Find Condition Grades
Different fields combine with AND. For example, a project filter and a date filter return inspections that match both.
Multiple values in an is any of filter combine with OR. Check the operator rather than assuming every multi-value filter behaves the same way.
For a grade-specific search, choose a count field such as ST4 Count and set the count to at least 1. Separate grade filters combine with AND: ST4 Count at least 1 plus ST5 Count at least 1 requires both grades, not either grade.
Advanced: Choose Columns and Sort Order
Select Customize columns.
Choose a preset or select the fields you need.
Drag columns into your preferred order.
Select a sortable column heading to change the order of the results.
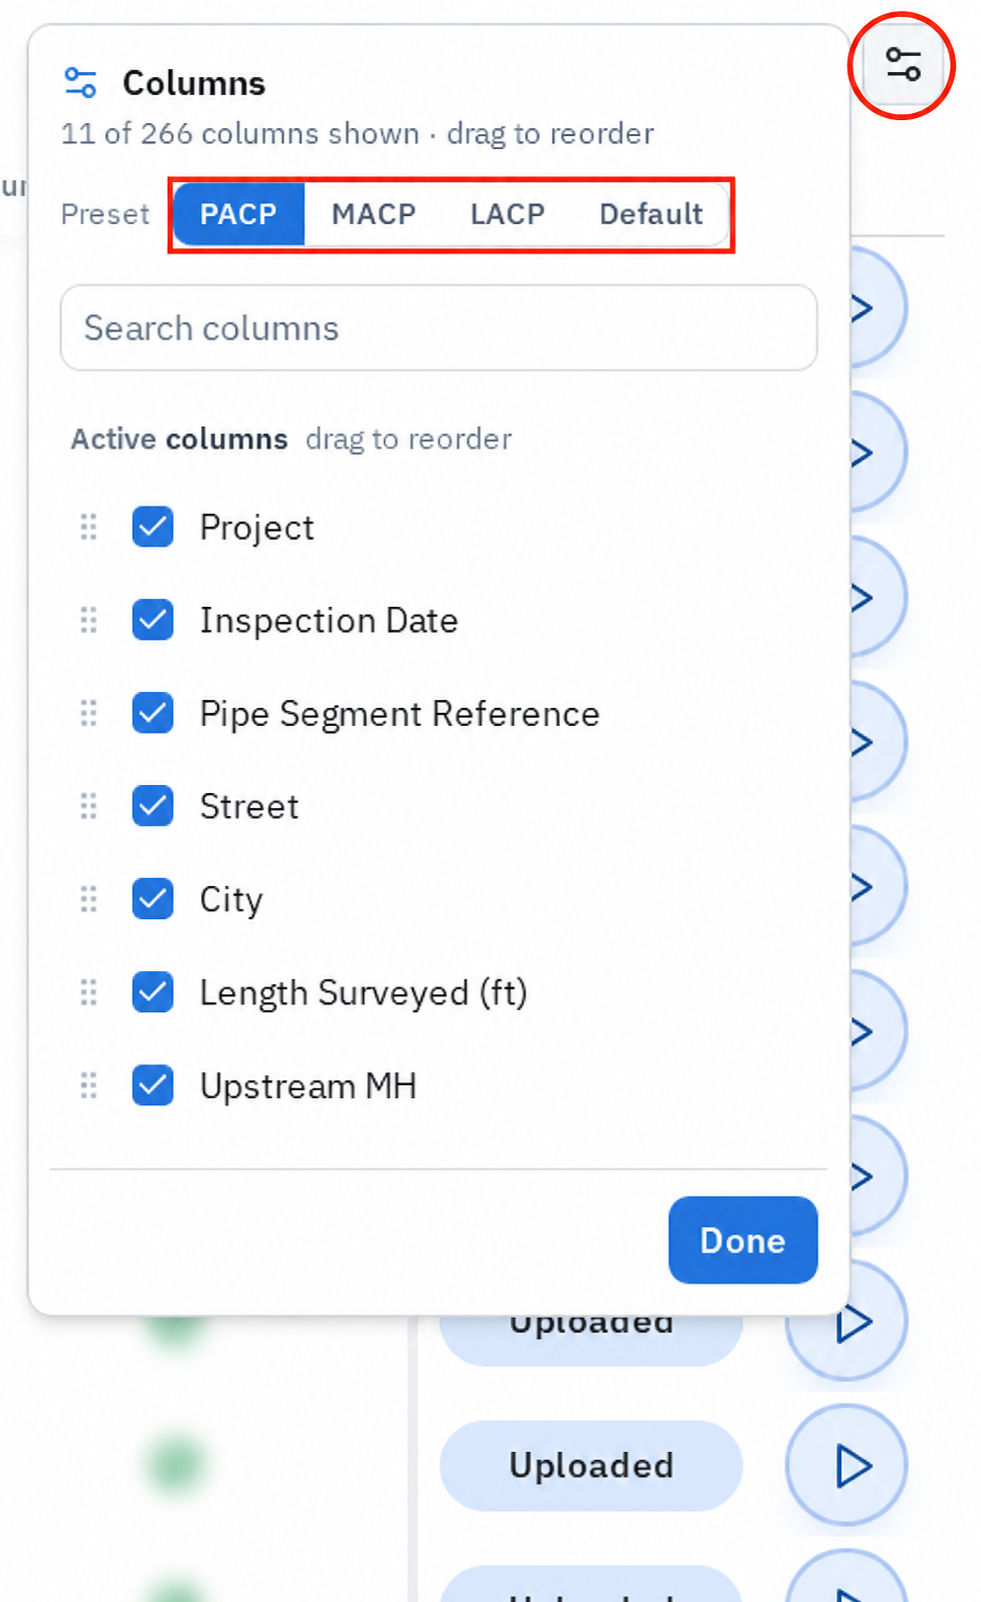
Set up your columns and sort order before saving a new bookmark if you want to keep them with the view.
Advanced: Manage Bookmarks and Keep Changes
Open a bookmark's three-dot menu to change its icon, rename it, duplicate it, or delete it. Deleting a bookmark leaves the inspections in place.
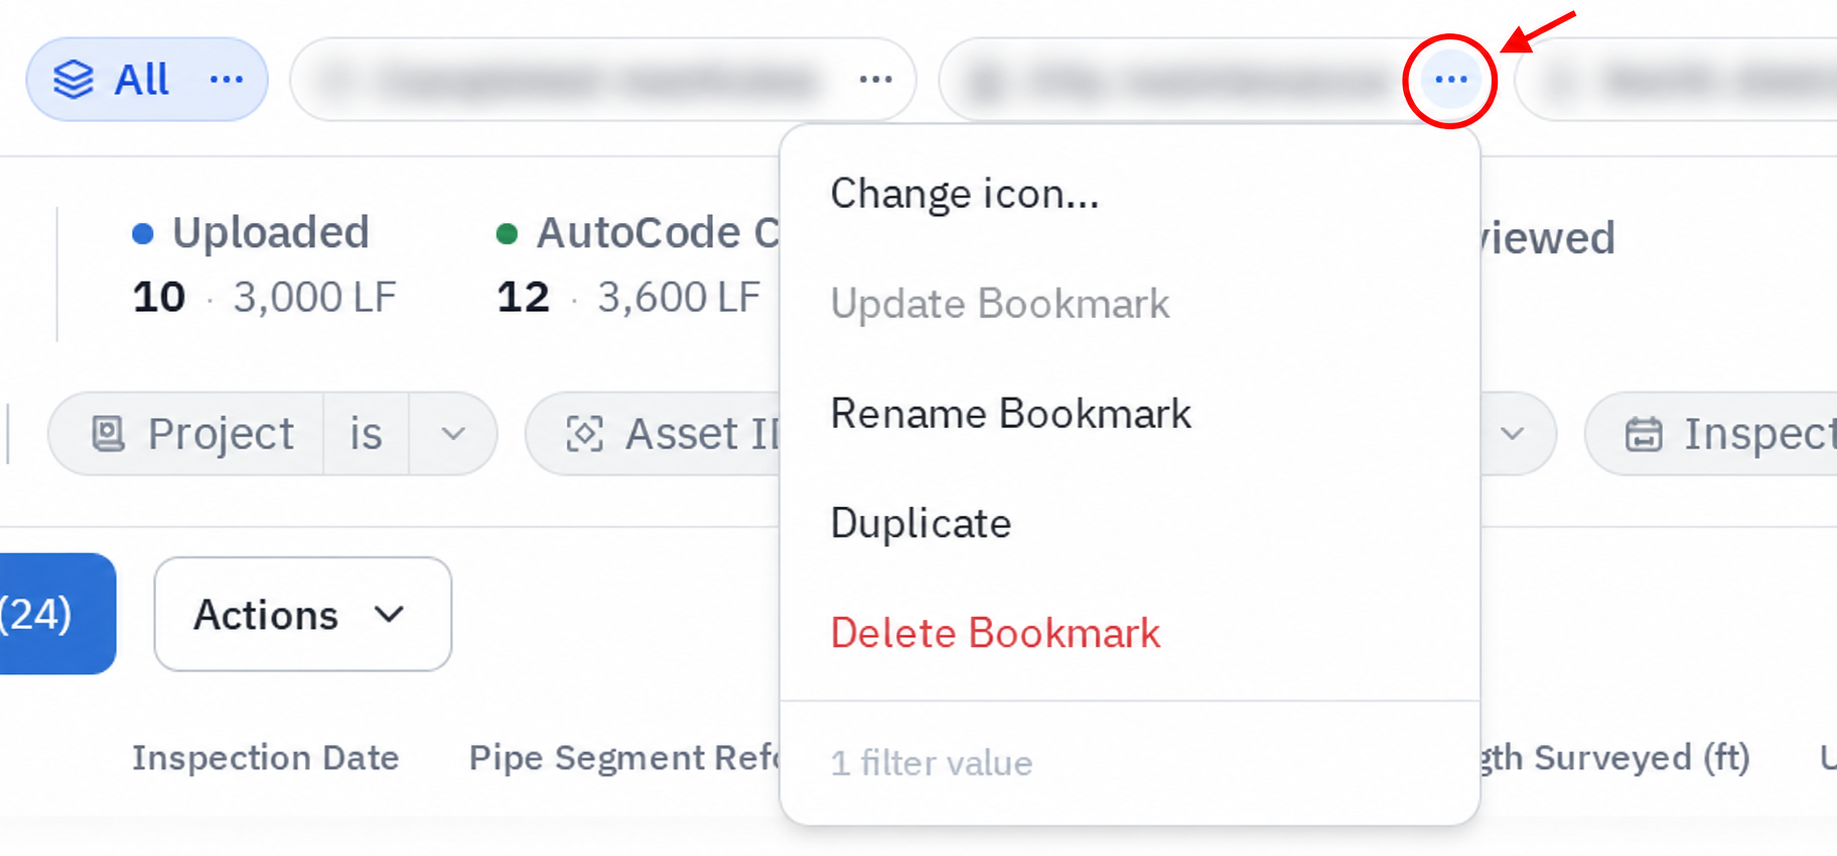
Changing filters or columns deselects the current bookmark in the new web layout. Save the revised view as a new bookmark to keep it, or select the original bookmark to return to its saved view.
A sort-only change keeps the bookmark selected. Use its three-dot menu and Update Bookmark to save that sort order.
Older layouts can show a dot for unsaved changes and offer Update Bookmark and Restore Bookmark. Use the controls shown on your page.
Advanced: Pin Frequently Used Filters
Open your account settings.
Select Preferences.
Find Pinned Filters under Inspections.
Select Edit to choose and arrange your quick filters.
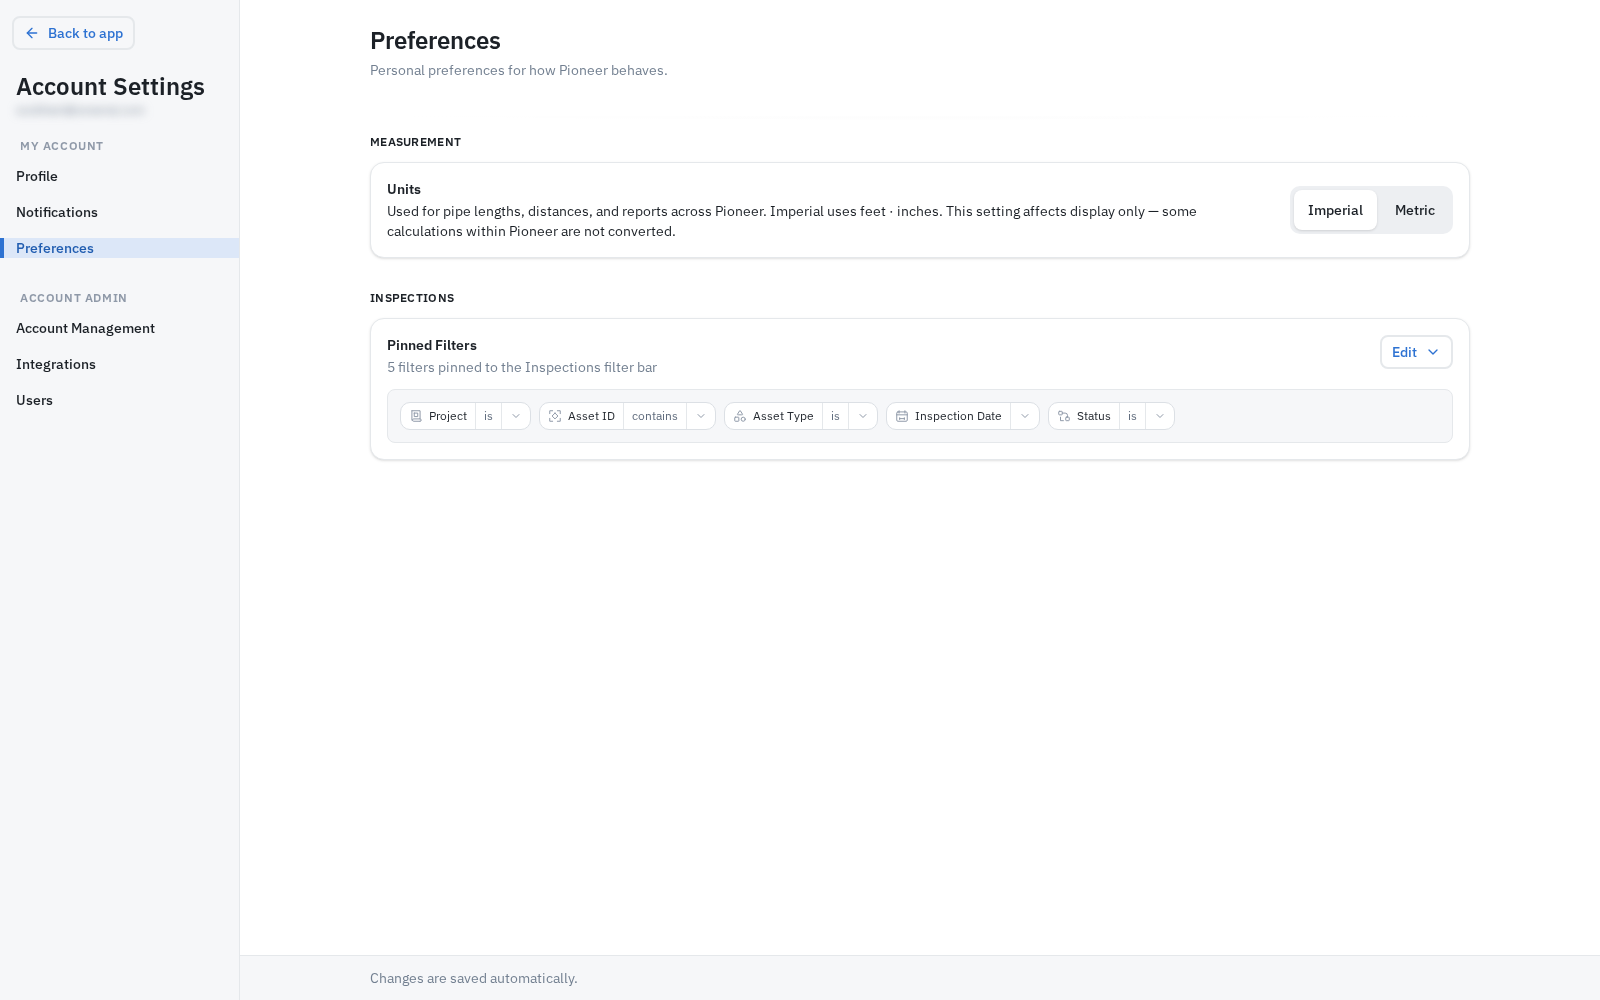
Pinned-filter preferences are saved in the current browser. They are separate from your server-saved bookmarks and do not follow you to another browser or computer.
Advanced: Share a Filtered View
Apply your filters so that no saved bookmark is selected.
Copy the page URL from your browser address bar.
Share it with a teammate who already has access to the relevant inspections.
Check the filters and columns after opening the link. A personal bookmark URL containing only a saved-view ID belongs to its owner; it does not share that bookmark with another person.
A shared link does not grant access to inspections the recipient cannot already see.
Shortcut
Press F to open the filter search while you are outside a text field, dialog, or menu.
Video Walkthrough
This recording shows earlier bookmark-saving controls. Use the written steps above for changing and saving the current web view.
Watch the filters and bookmarks walkthrough
Related Articles
Still Need Help?
Use the chat widget in PIONEER to contact our support team.
If you cannot access the chat widget, email help@sewerai.com.