How to "Prefill" Header Data for Inspections with CSV, Excel or MDB
Last updated: November 9, 2026
Create inspection header rows before field work, then record or upload their matching videos. Header creation is separate from updating an existing inspection by SID.
Prepare the Header Data
Use one project and inspection type per import.
Use the expected NASSCO field values and codes.
If you will upload videos separately, include Video Name with the complete filename and extension.
For CSV files, use up to 200 inspections per file as supported guidance. Split larger work into separate files.
Start with a small import and verify its results before importing the rest.
Create Rows from an MDB
Select Upload files.
Choose the account and project.
Select the folder containing your NASSCO Exchange MDB version 6 or 7.
Review the detected files and upload only the database for this header-only step.
Check the destination project's new Upload Pending rows.
Do not re-upload the database as a way to correct existing rows. Additional imports can create additional inspections.
Create Rows with the Header Importer
Use this importer for CSV or Excel spreadsheets. It opens a separate header-mapping wizard, rather than the folder uploader.
On Inspections, open Actions > Upload CSV. If your layout has separate buttons, open the three-dot menu and choose Upload CSV.
In Add Bulk Inspections, choose the account, project and Inspection Type.
Select Import CSV and choose your file.
Confirm the row containing the column names.
Review the suggested column matches and ignore fields you do not want imported.
Review any suggested value matches, then check the final rows before selecting Finish.
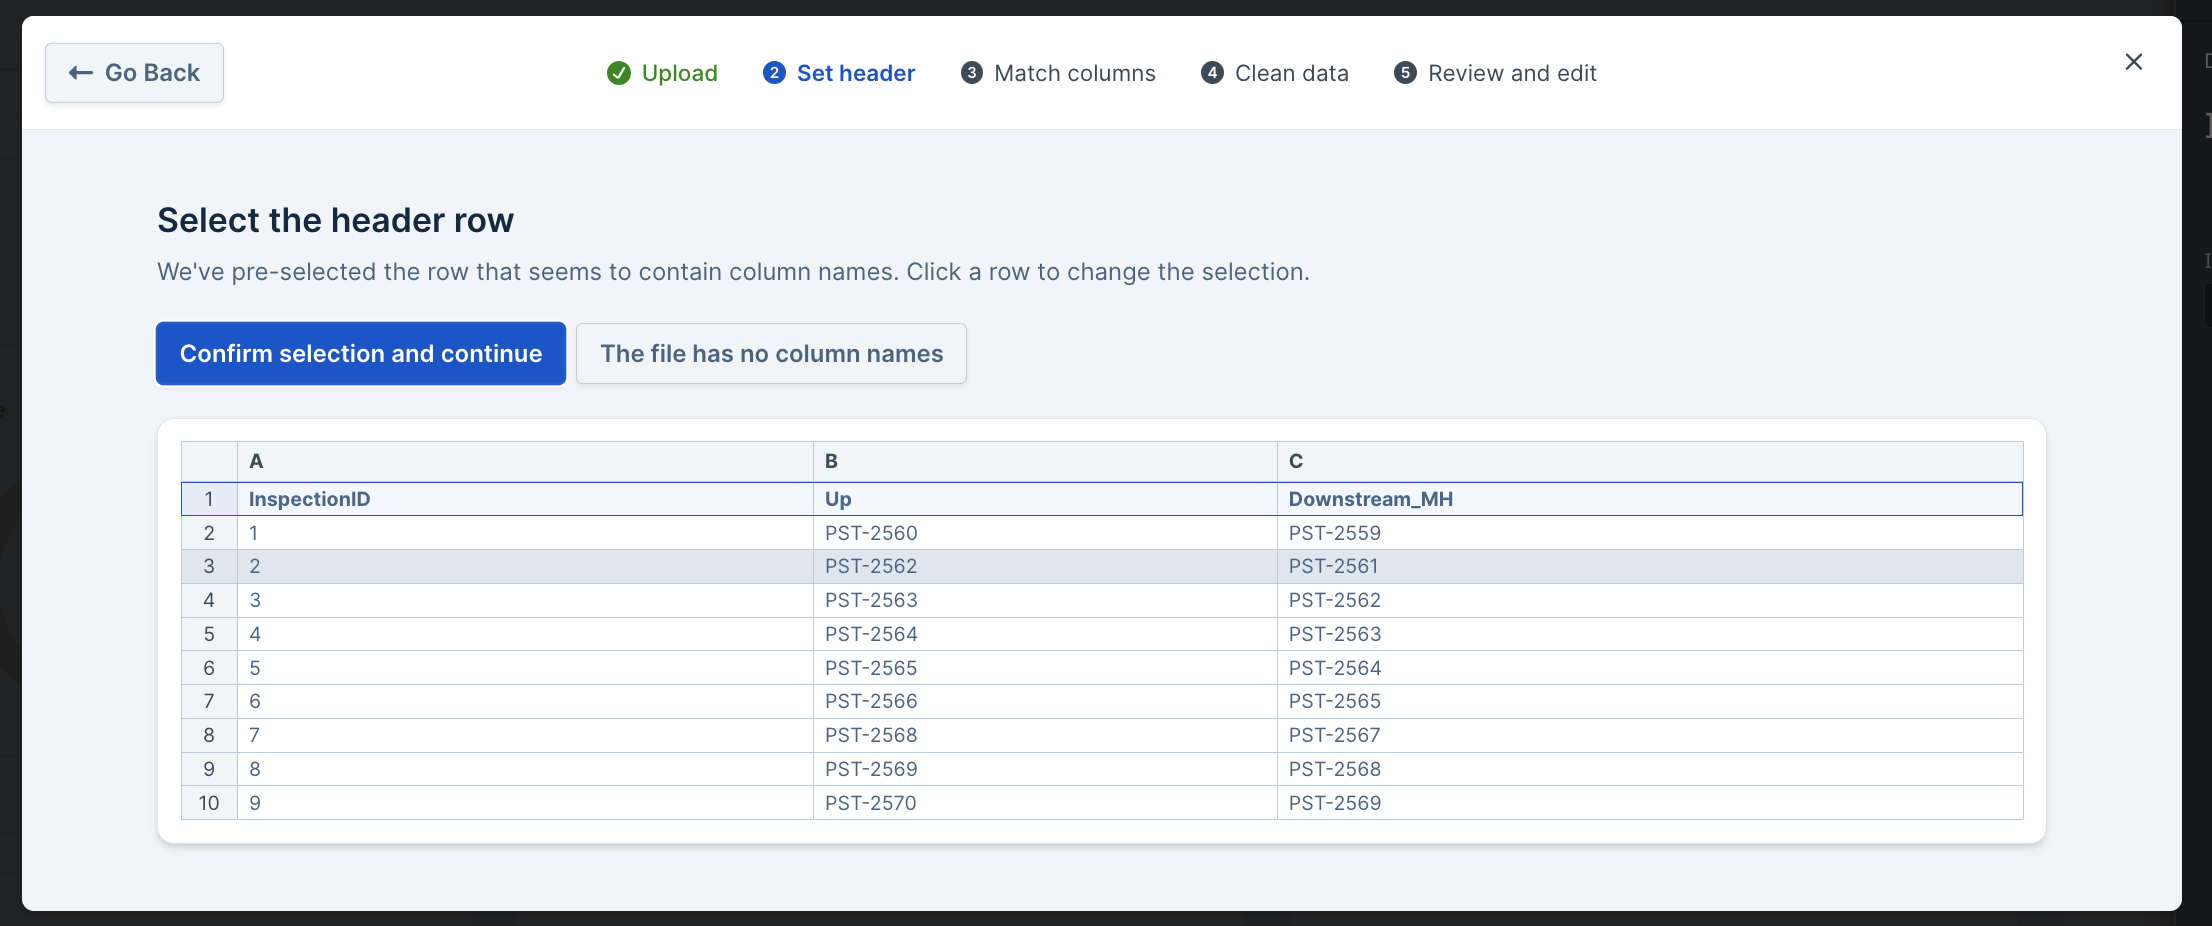
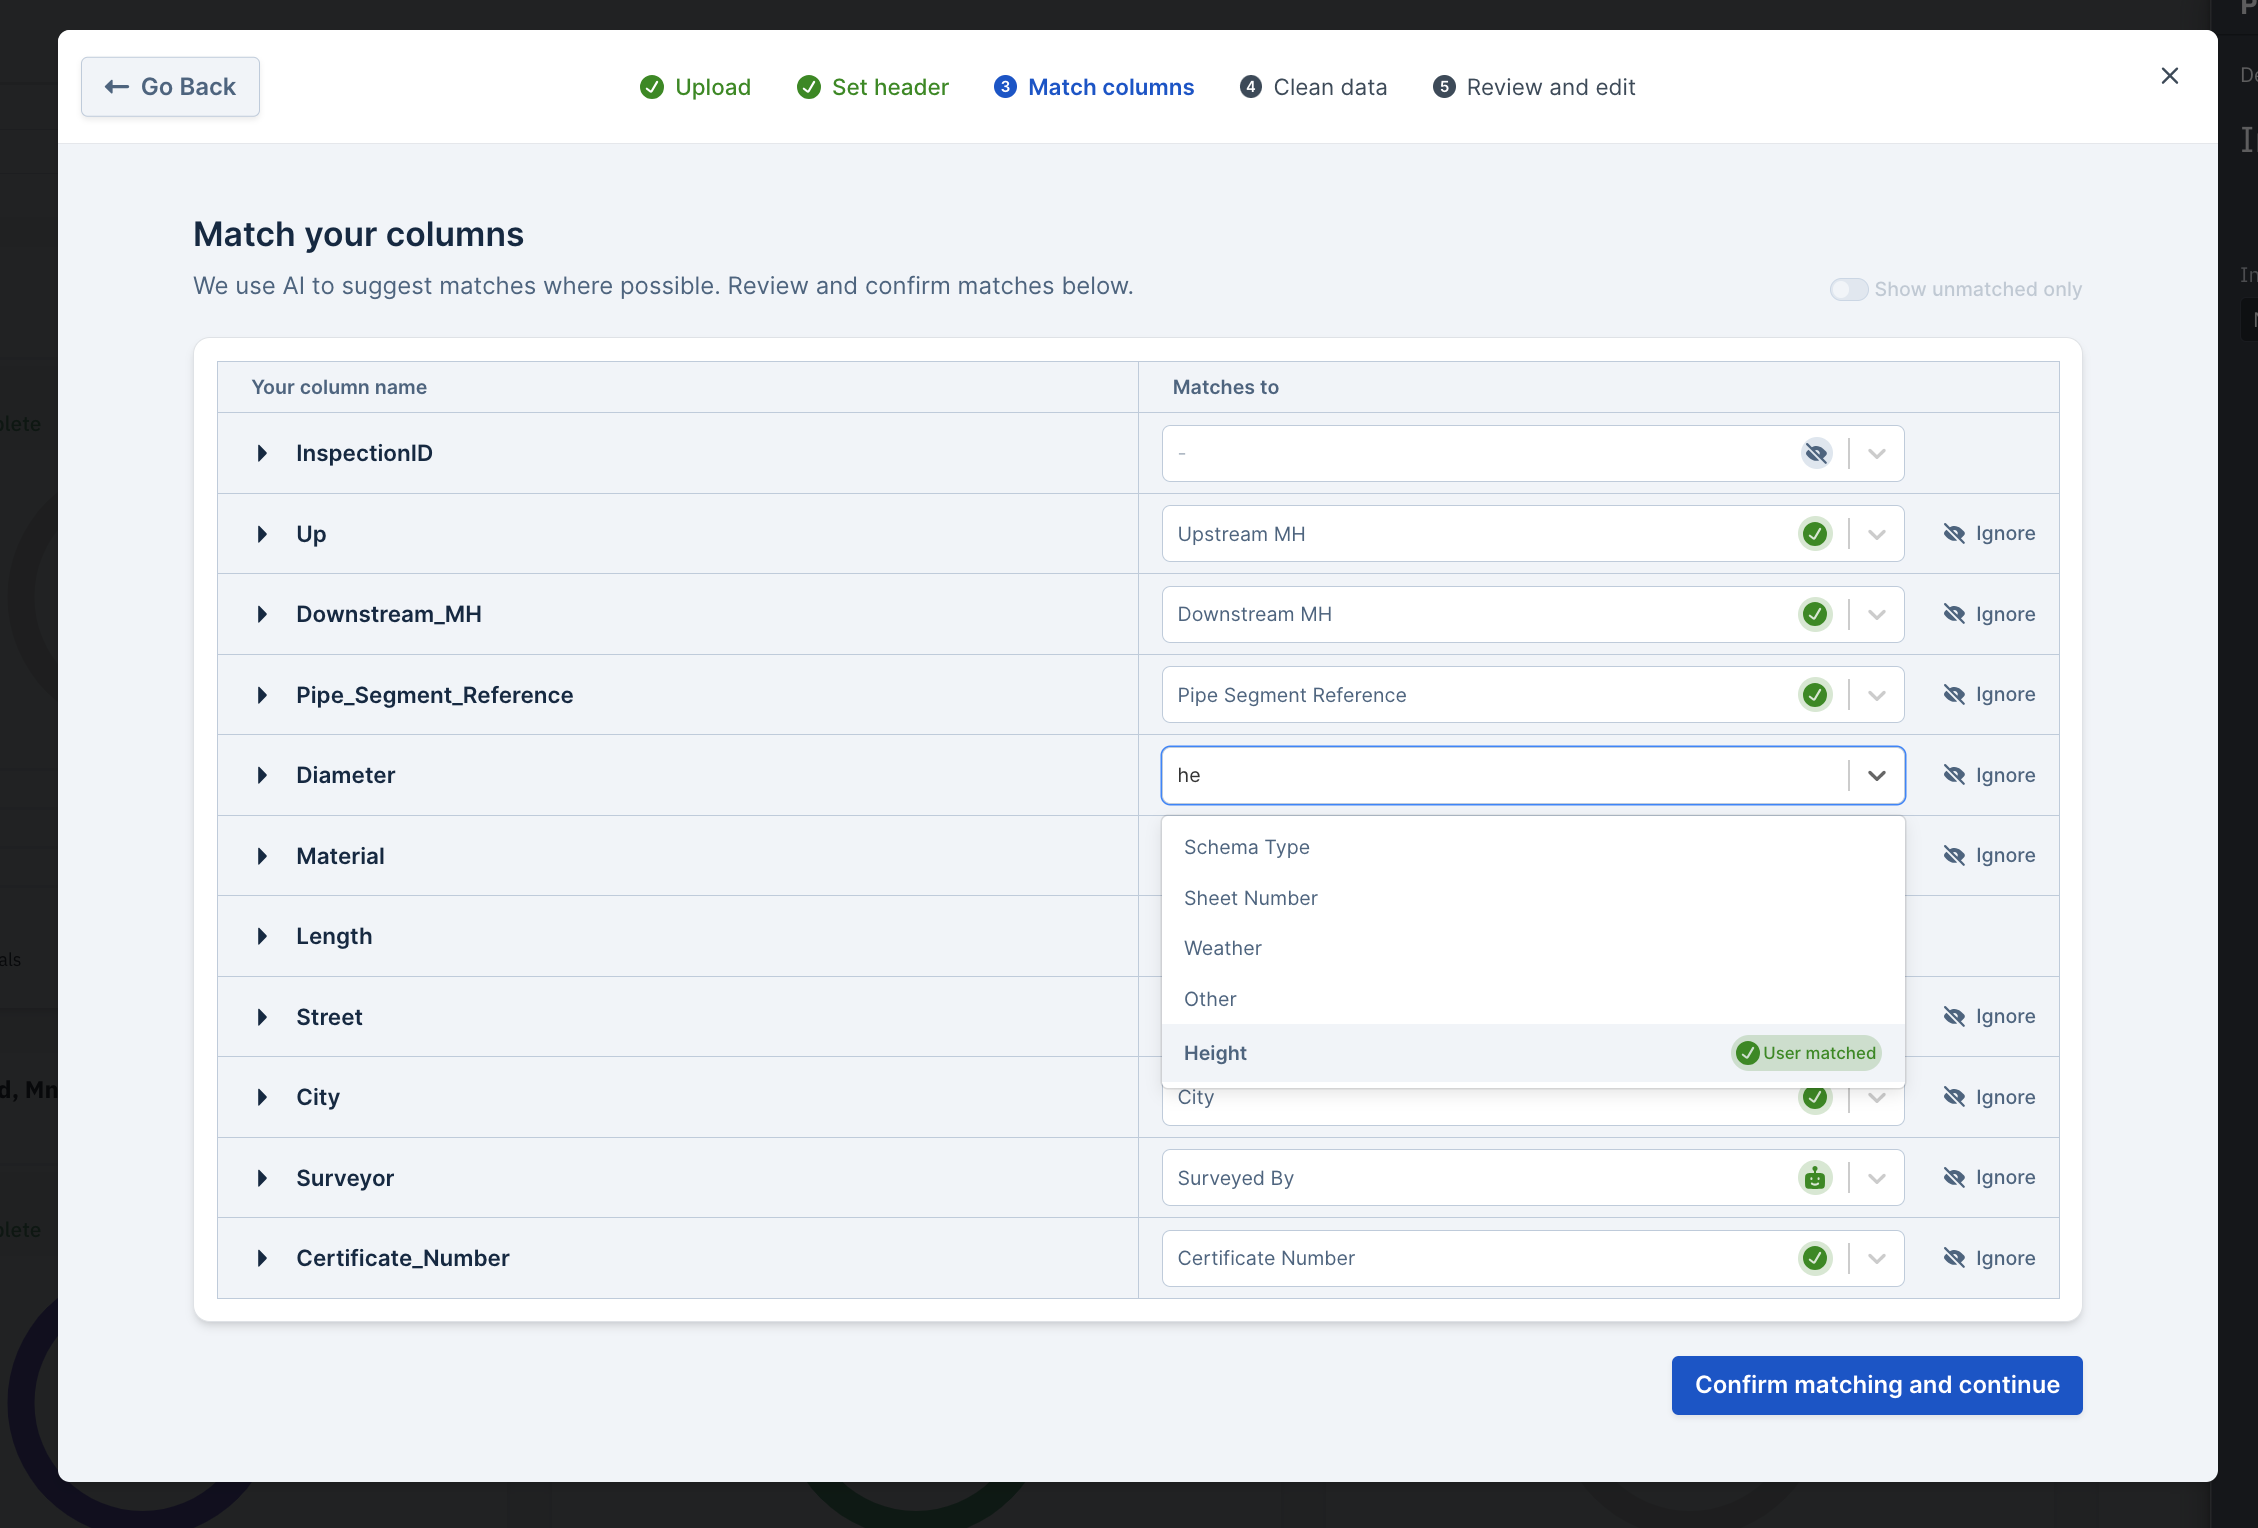
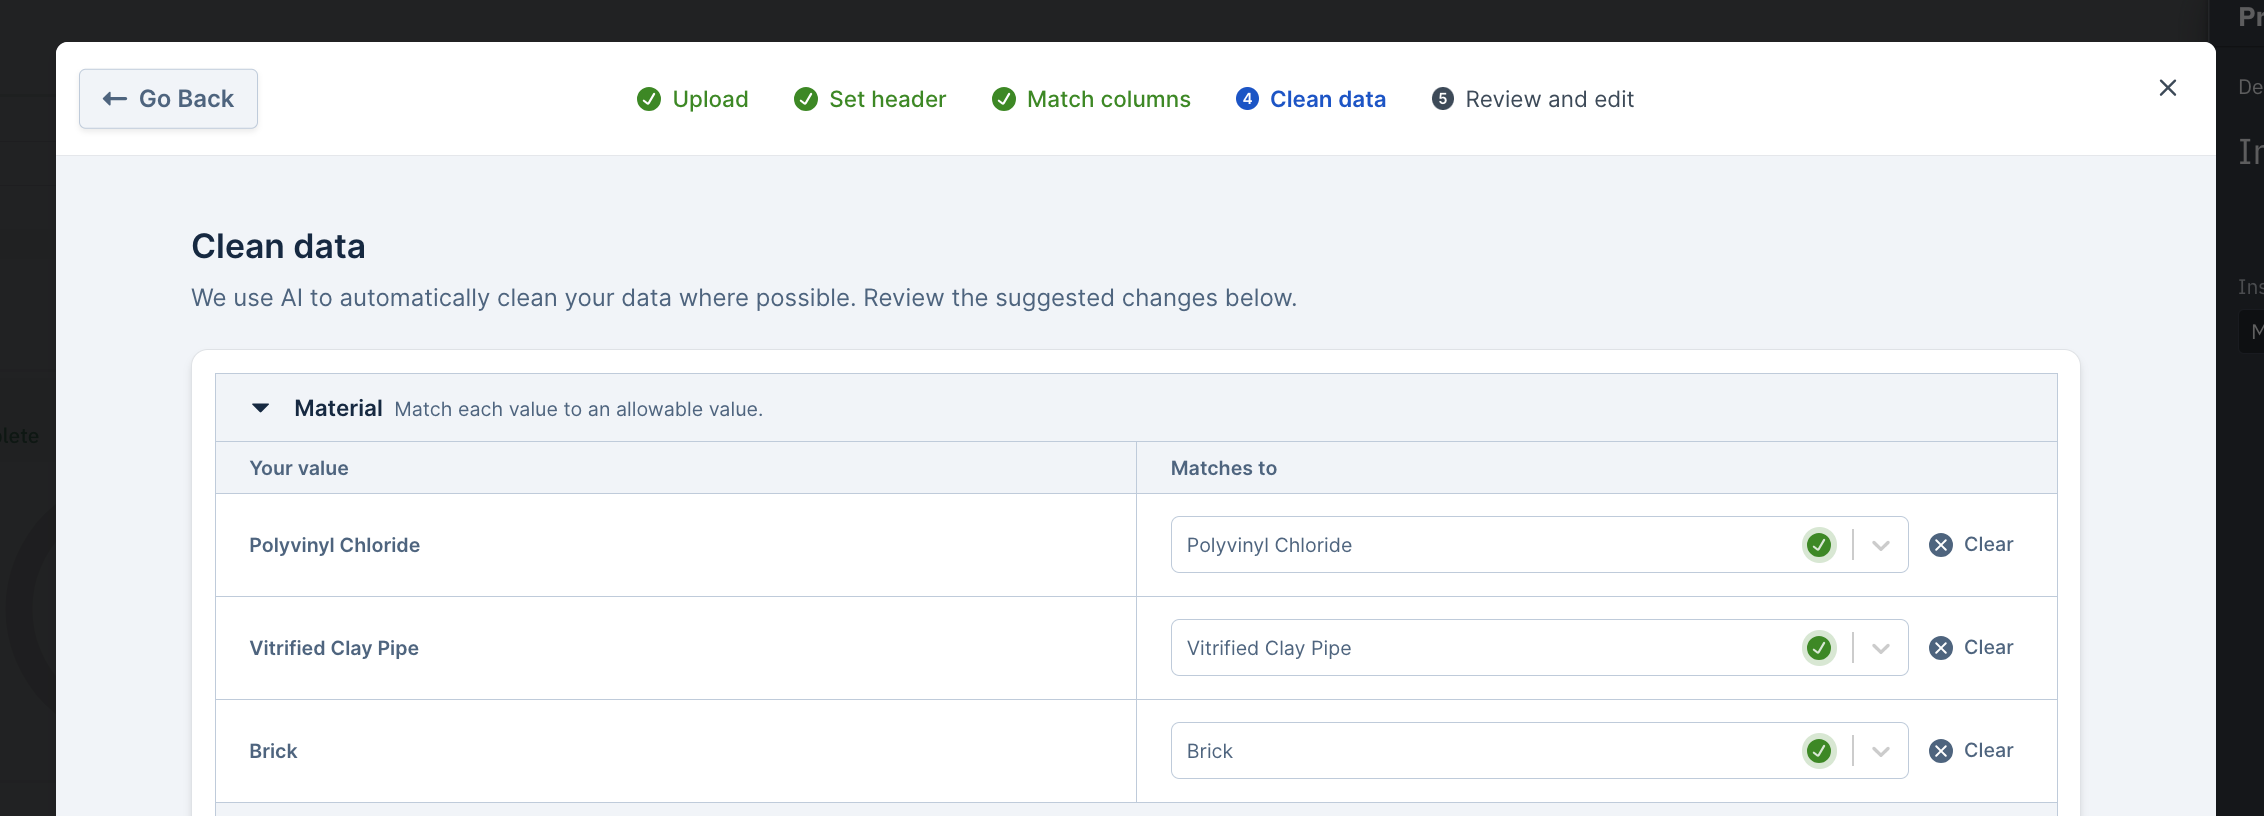
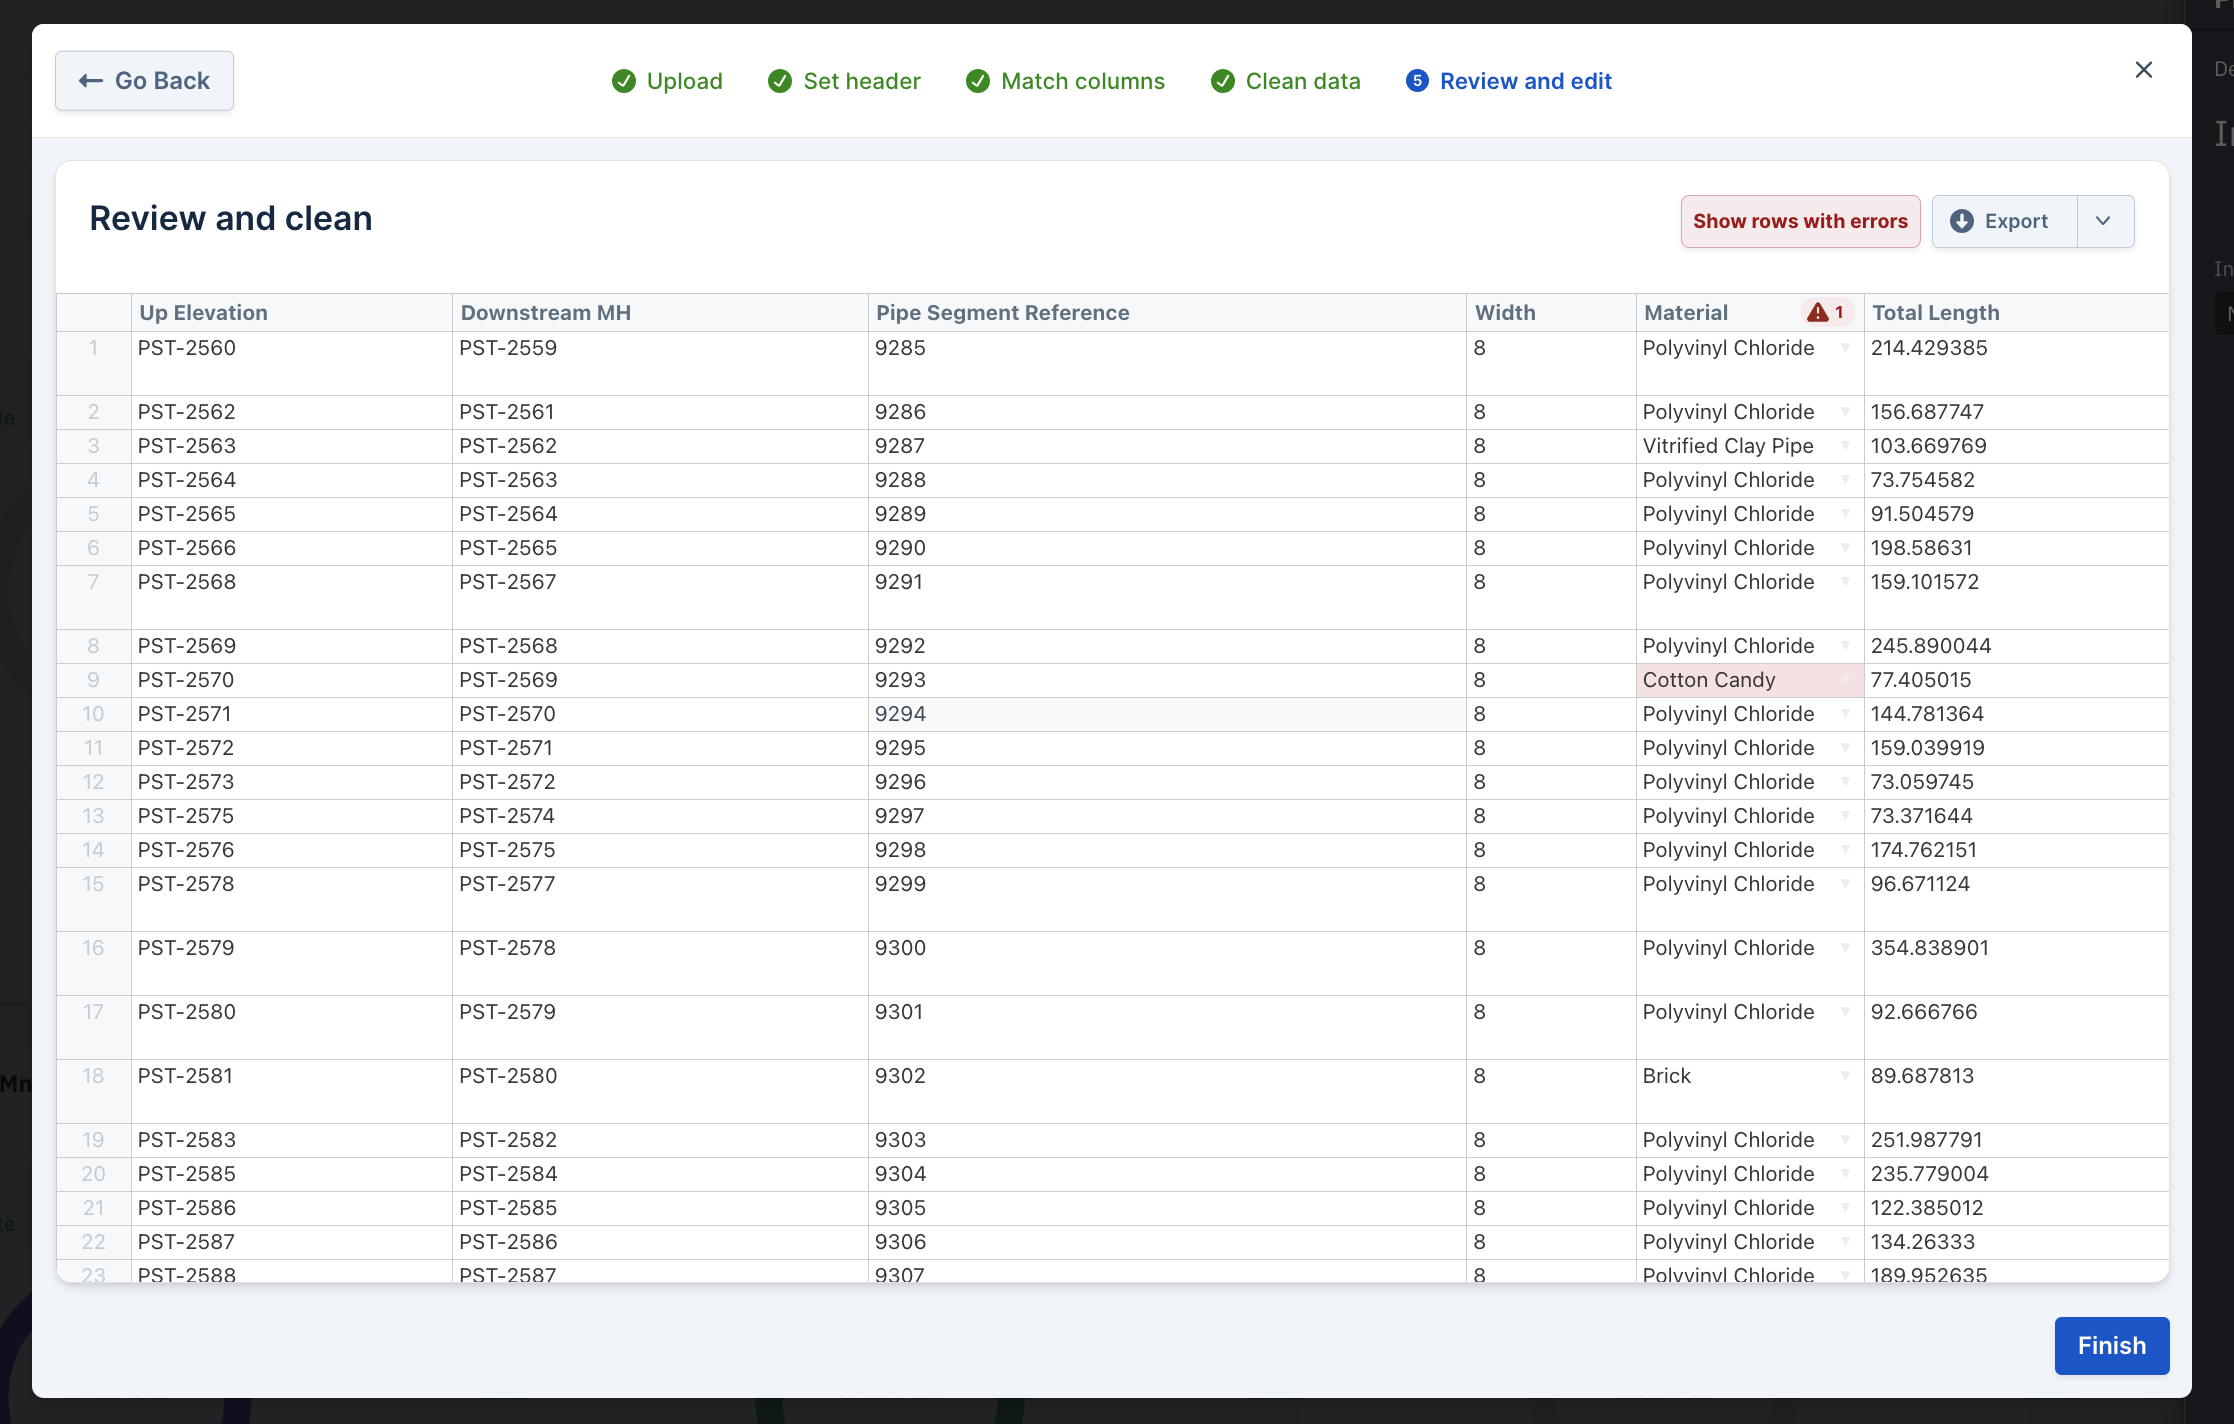
Automatic matches can be wrong. A No errors message does not establish that a column was mapped to the field you intended.
To update existing inspections, preserve and match their sid values instead. Follow the separate CSV bulk-edit guide; omitting SID can create new rows. For help clearing existing values or handling a failed import, contact Support before retrying.
Start Planned Work in PIONEER Desktop
On the recording computer, open Inspections, rather than Field Inspections.
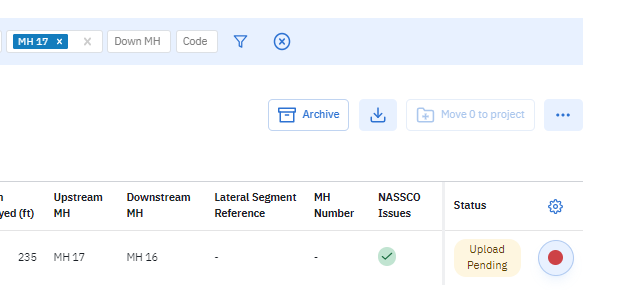
Filter to the project and locate the intended Upload Pending row.
Select the red recording control at the end of that row.
Check the prefilled header in the Recorder before recording.
Starting the local inspection can set its inspection date and time to the current recording time. Check these fields before continuing.

Match a Separately Uploaded Video
Use the same project and the exact Video Name, including extension. The CSV or database can arrive before or after the video. If they remain as two rows, confirm that they describe the same inspection and contact Support if matching does not finish. Use Combine Rows only for a confirmed matching data/video pair; the customer cannot undo that merge.
Related Guides
Still Need Help?
Use the chat widget in PIONEER to contact our support team.
If you cannot access the chat widget, email help@sewerai.com.