Uploading Inspections
Last updated: November 9, 2026
Upload inspection databases and their video files to a PIONEER project. File transfer, database matching and video processing are separate steps.
Before You Start
Use a current version of Google Chrome.
You need Uploader, Editor or Admin access to the destination account or project.
Keep the original database and videos together in a folder on your computer.
Prefer one database per upload. Use a NASSCO Exchange MDB, version 6 or 7.
Check that each database Video Name matches its video filename, including the extension.
You can upload a database and its videos together or separately. They must belong to the same project to match. A database row without matched video can remain Upload Pending; an unmatched video can appear as a separate inspection.

Choose the Destination
Select Upload files in the left navigation.
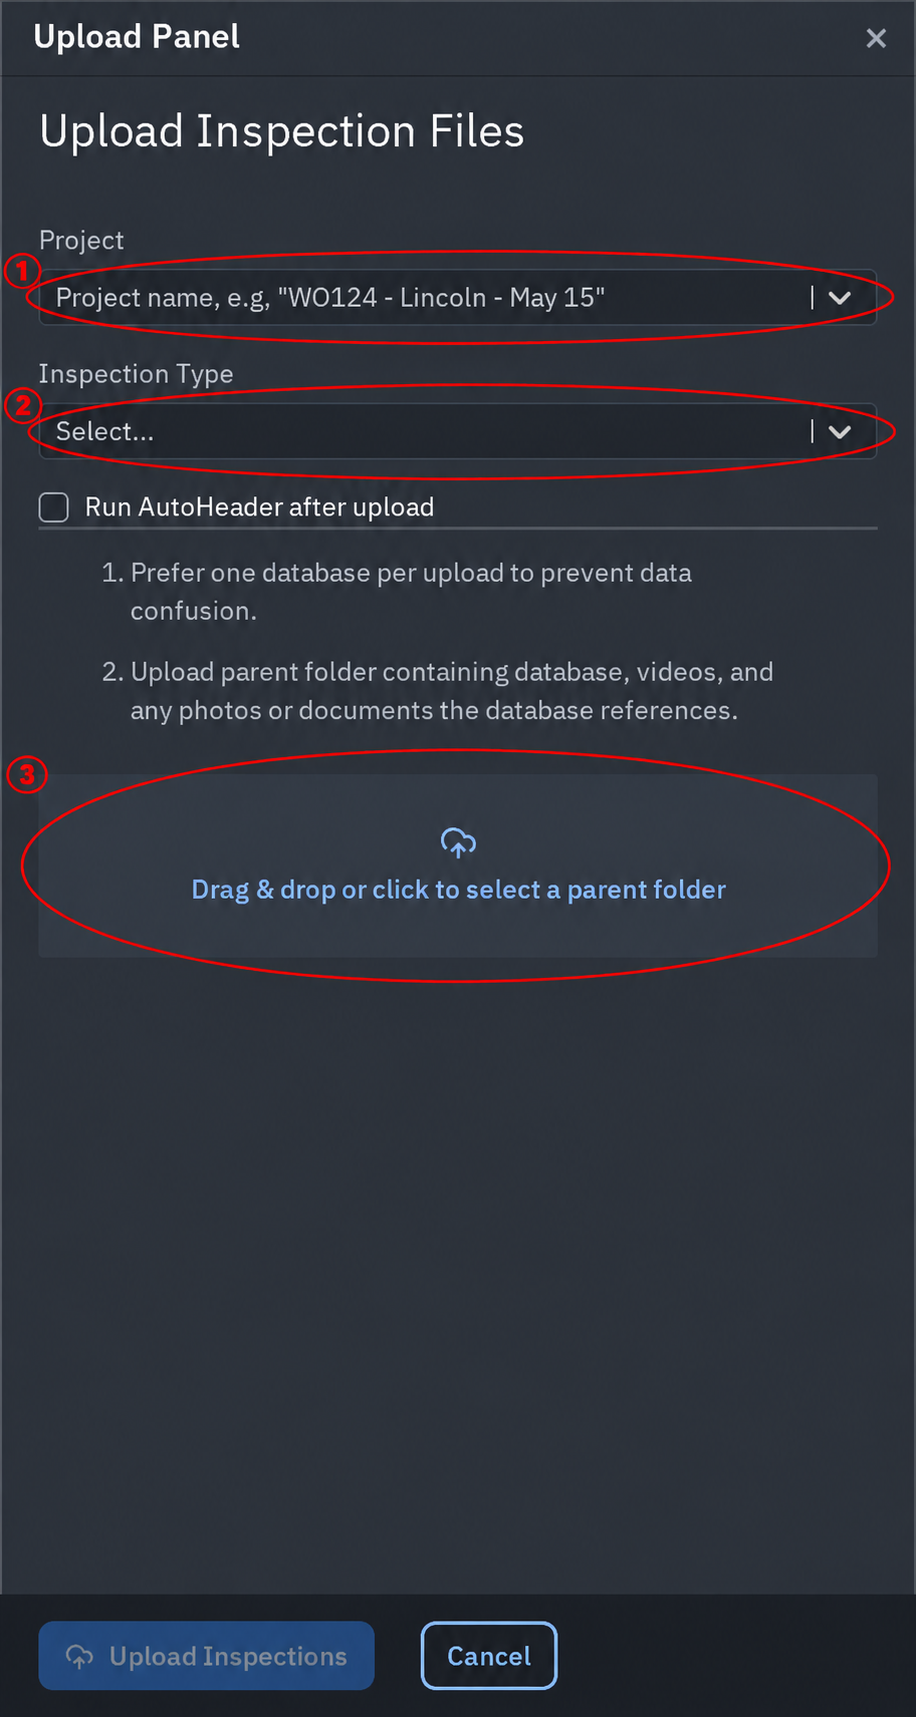
In Upload Inspection Files, choose the account if that field is shown.
Choose the existing Project. To create one, enter its name, choose the create option and complete Save Project.
Choose the appropriate Inspection Type: Mainline, Lateral, Mainline & Lateral combined, or Maintenance Hole (Manhole).
Select Run AutoHeader after upload if you want that processing for the uploaded videos.
Inspection type in an imported MDB comes from the database. Check the resulting inspection types after import.
Select and Upload Files
Select Drag & drop or click to select a parent folder.
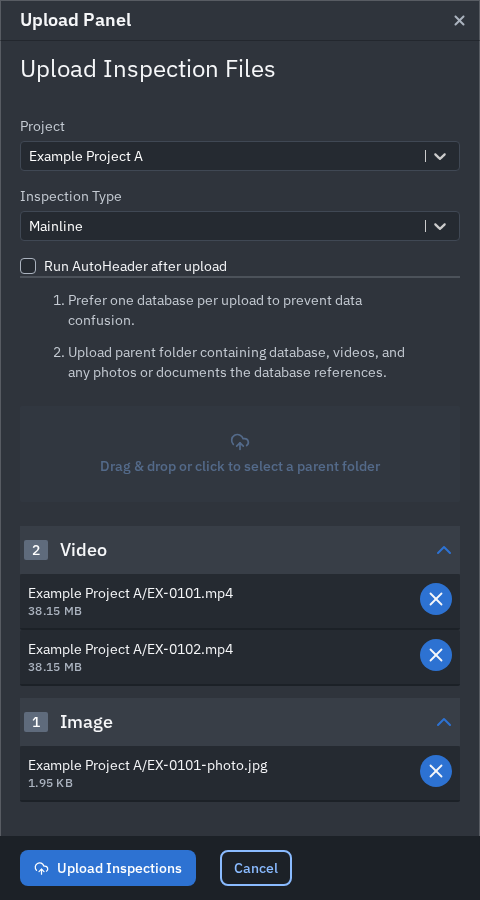
Choose the parent folder containing your database and videos, and allow access when Chrome asks.
Review the detected files. Remove unrelated files or extra databases using their remove controls.
Select Upload Inspections.
A CSV placed in this folder is not a substitute for the header importer. Use Actions > Upload CSV to create header rows from a CSV.
Check Progress and Results
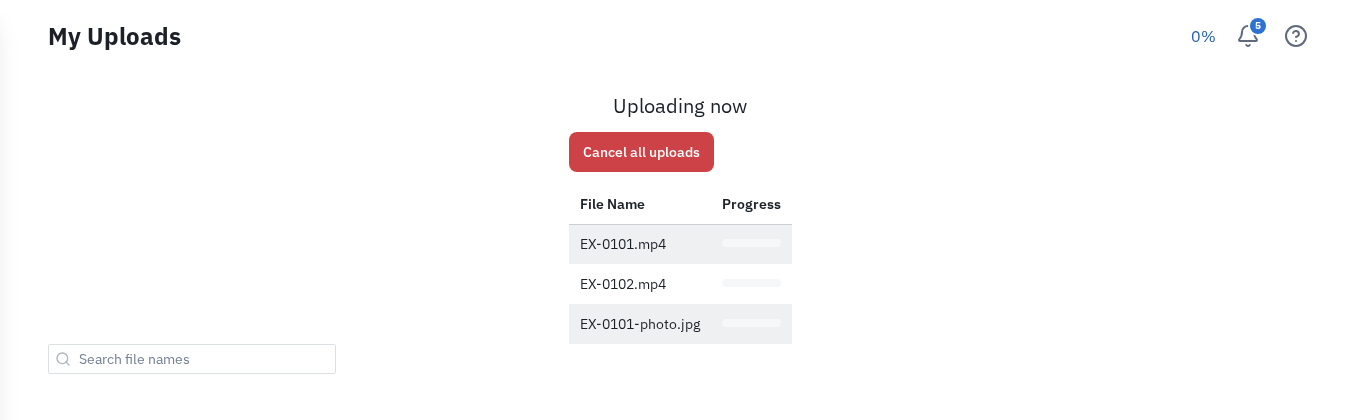
Open Uploads to check the current transfer and batch status.
Keep PIONEER open and the source files available until the transfer finishes.
Open the destination project on Inspections.
Check that the expected rows and headers are present and that each video opens and plays.
An upload-complete message does not by itself confirm successful database import, matching or playable video. Read any status details before deciding to upload again.
If an Upload Is Interrupted
Use the failed transfer's Retry control when available. Chrome folder uploads may offer Pending uploads > Resume after reopening PIONEER. This does not apply to every browser or the Desktop upload panel.
If the files have transferred but the inspection is missing, mismatched or stuck processing, contact Support with the project, filenames and displayed error. Keep the original files. Re-uploading a database can create additional inspection rows.
Syncing a recording from Field Inspections is a separate Desktop workflow. Do not use re-sync to replace media already attached to a cloud inspection.
Video Walkthrough
This earlier walkthrough illustrates folder selection and uploading. It shows older controls, including a software picker. Follow the current steps above for the Upload Panel.
Related Guides
Still Need Help?
Use the chat widget in PIONEER to contact our support team.
If you cannot access the chat widget, email help@sewerai.com.