Draw on Maps: Build and Fix Your Map Right in Pioneer
Last updated: November 17, 2026
No GIS layer, or an outdated one? Draw the network yourself and deliver a real map with the job.
Create mains, laterals, and manholes in Pioneer, fix what’s missing or misplaced, and export the result as GIS data for your client.
Draw on Maps
Many jobs start without a usable map. Sometimes the city has no GIS layer at all. Other times it’s out of date, and your crew finds manholes and laterals that aren’t on it. Either way, someone ends up sketching on a PDF, building a spreadsheet, or redrawing everything in another program at the end of the job.
With Draw on Maps, Pioneer becomes the place where you build the map, not just view it. Set up a layer, draw what’s missing, fix what’s wrong, and hand your client GIS data they can use.
What you can do
Start from a blank map. Build a layer for mains, laterals, or manholes, even if your client never sent a GIS file.
Add what’s missing. Draw in mains, laterals, and manholes your crew finds in the field or sees on video.
Fix locations. Move a manhole or drag a line’s endpoint into place instead of deleting it and starting over.
Correct details. Update IDs, material, size, and other fields right on the map.
Deliver a usable map. Export the finished layer as GIS data instead of a marked-up PDF or screenshot.
Step 1: Create a layer and choose its fields
Start with a blank layer before you draw anything. When you create it, you’ll set:
Asset type: mainline, lateral or manhole
Layer name: what your team will see in the map’s layer list
Account and project: the project is optional
Required ID: Pipe Segment Reference for mains, Lateral Segment Reference for laterals, or Manhole ID for manholes
Other fields: the details every new asset in this layer should have
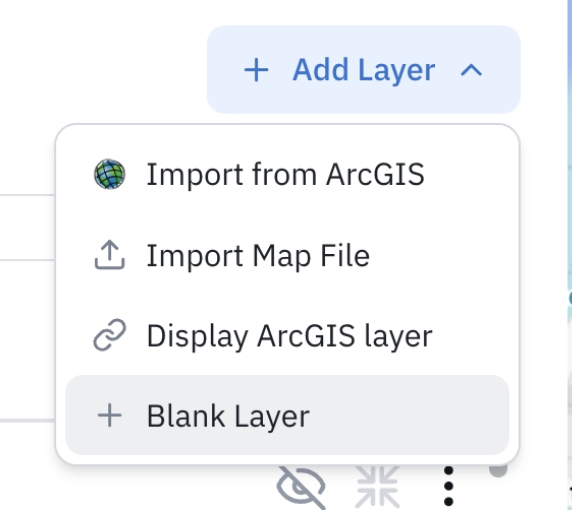
Suggested fields:
Mains and laterals: segment ID, upstream manhole, downstream manhole, material, size, year installed, and address, where it helps
Manholes: Manhole ID, rim-to-invert depth, year installed, material or type, and notes
Already working from a map your client sent? You can draw on that layer too. For new assets, use the fields set up when the map was imported.
Step 2: Draw your assets
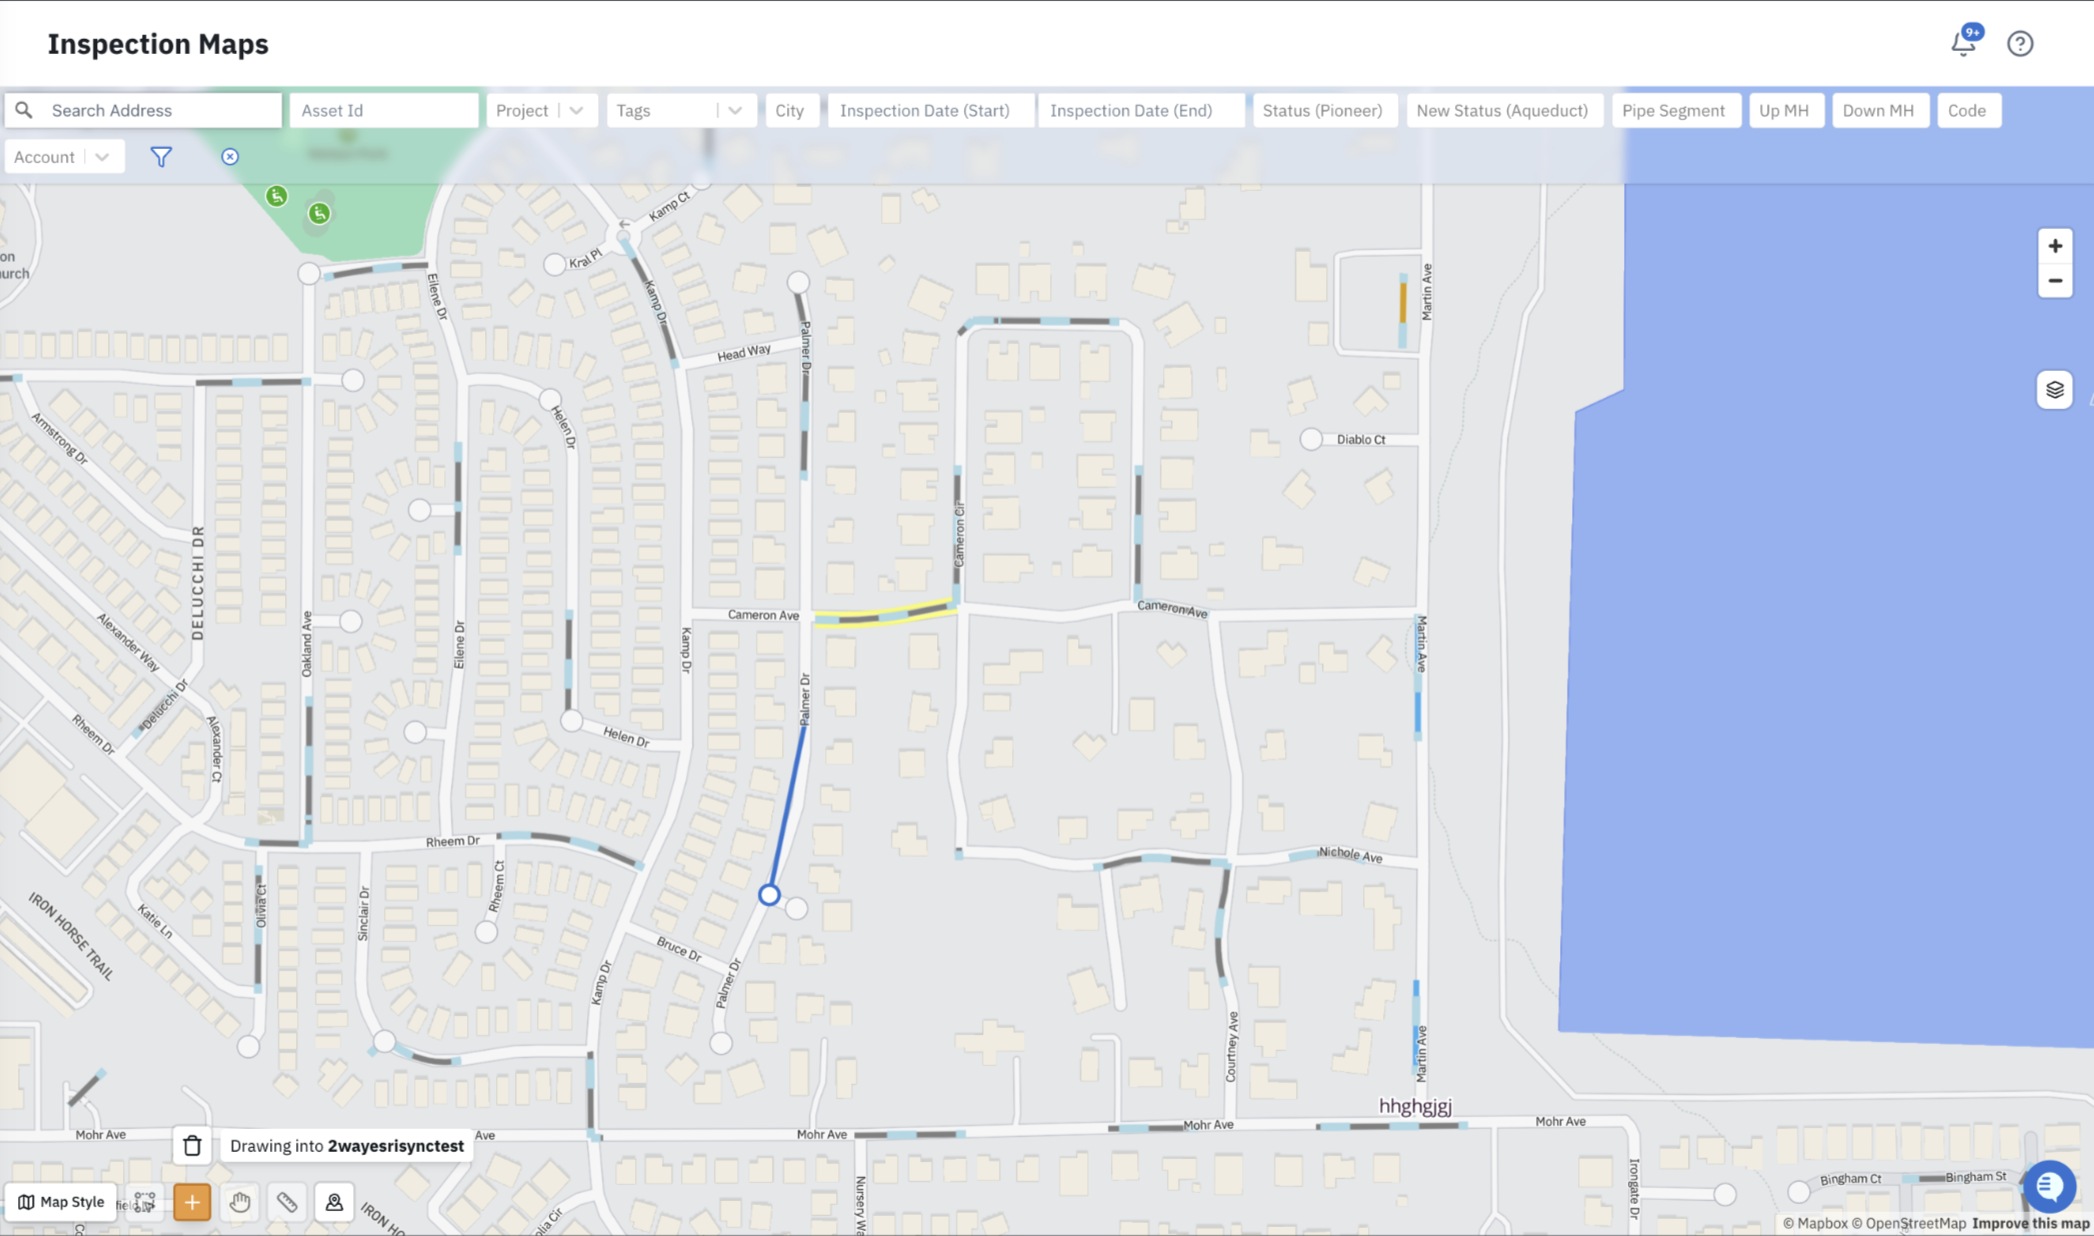
Choose the layer you want to draw on.
Select the draw tool in the map controls.
Click once to place a manhole, or click point by point to draw a main or lateral.
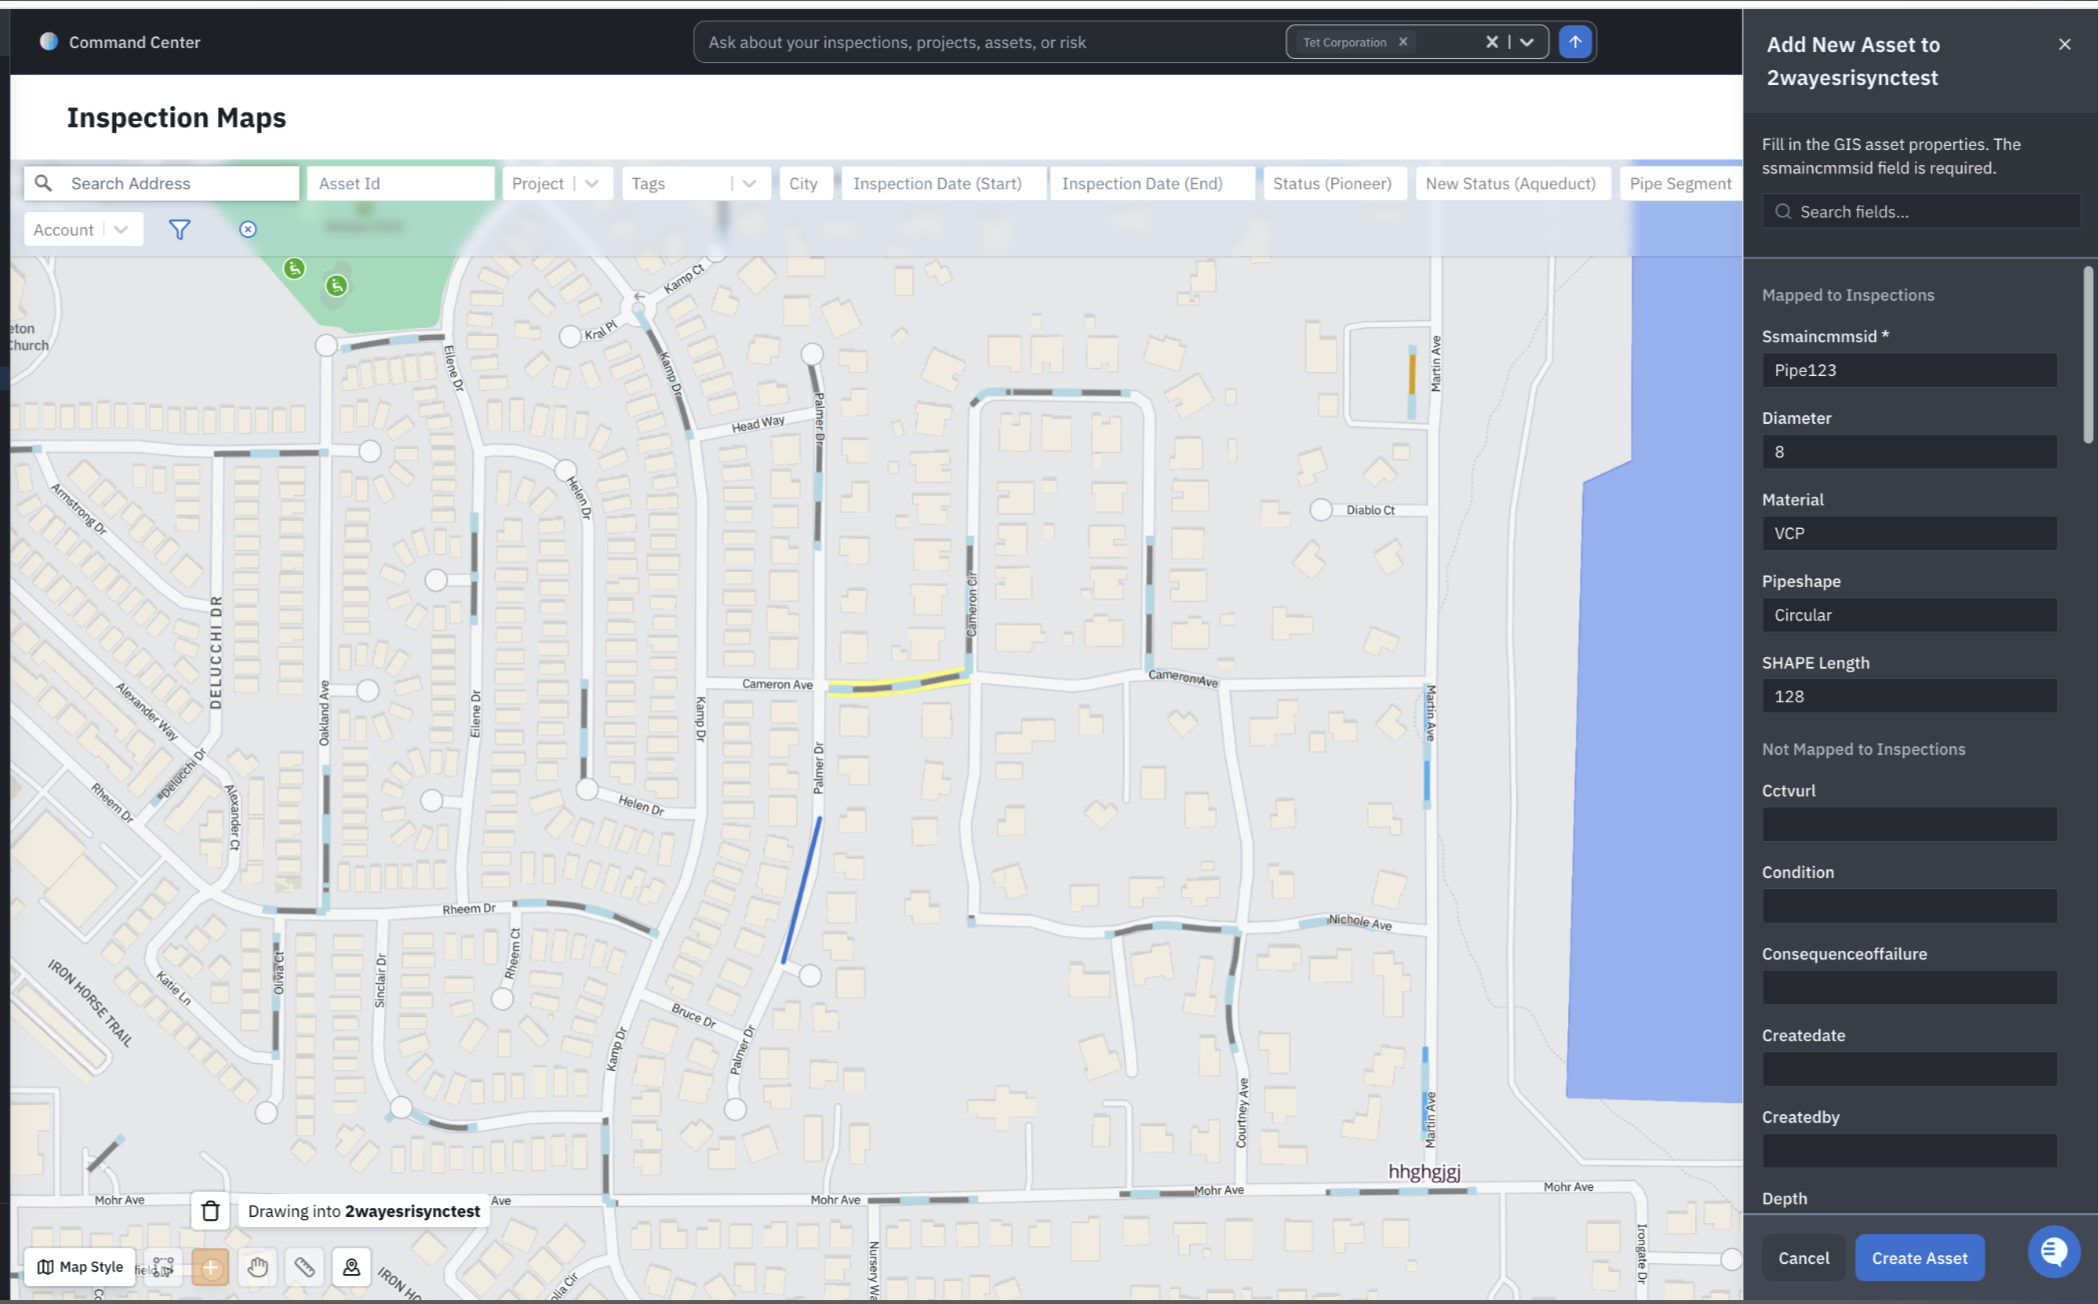
Fill in the asset’s details. You must fill in the required ID before you can save.
Select Create Asset.
The asset and its details now appear together on the map.
Step 3: Move assets into place
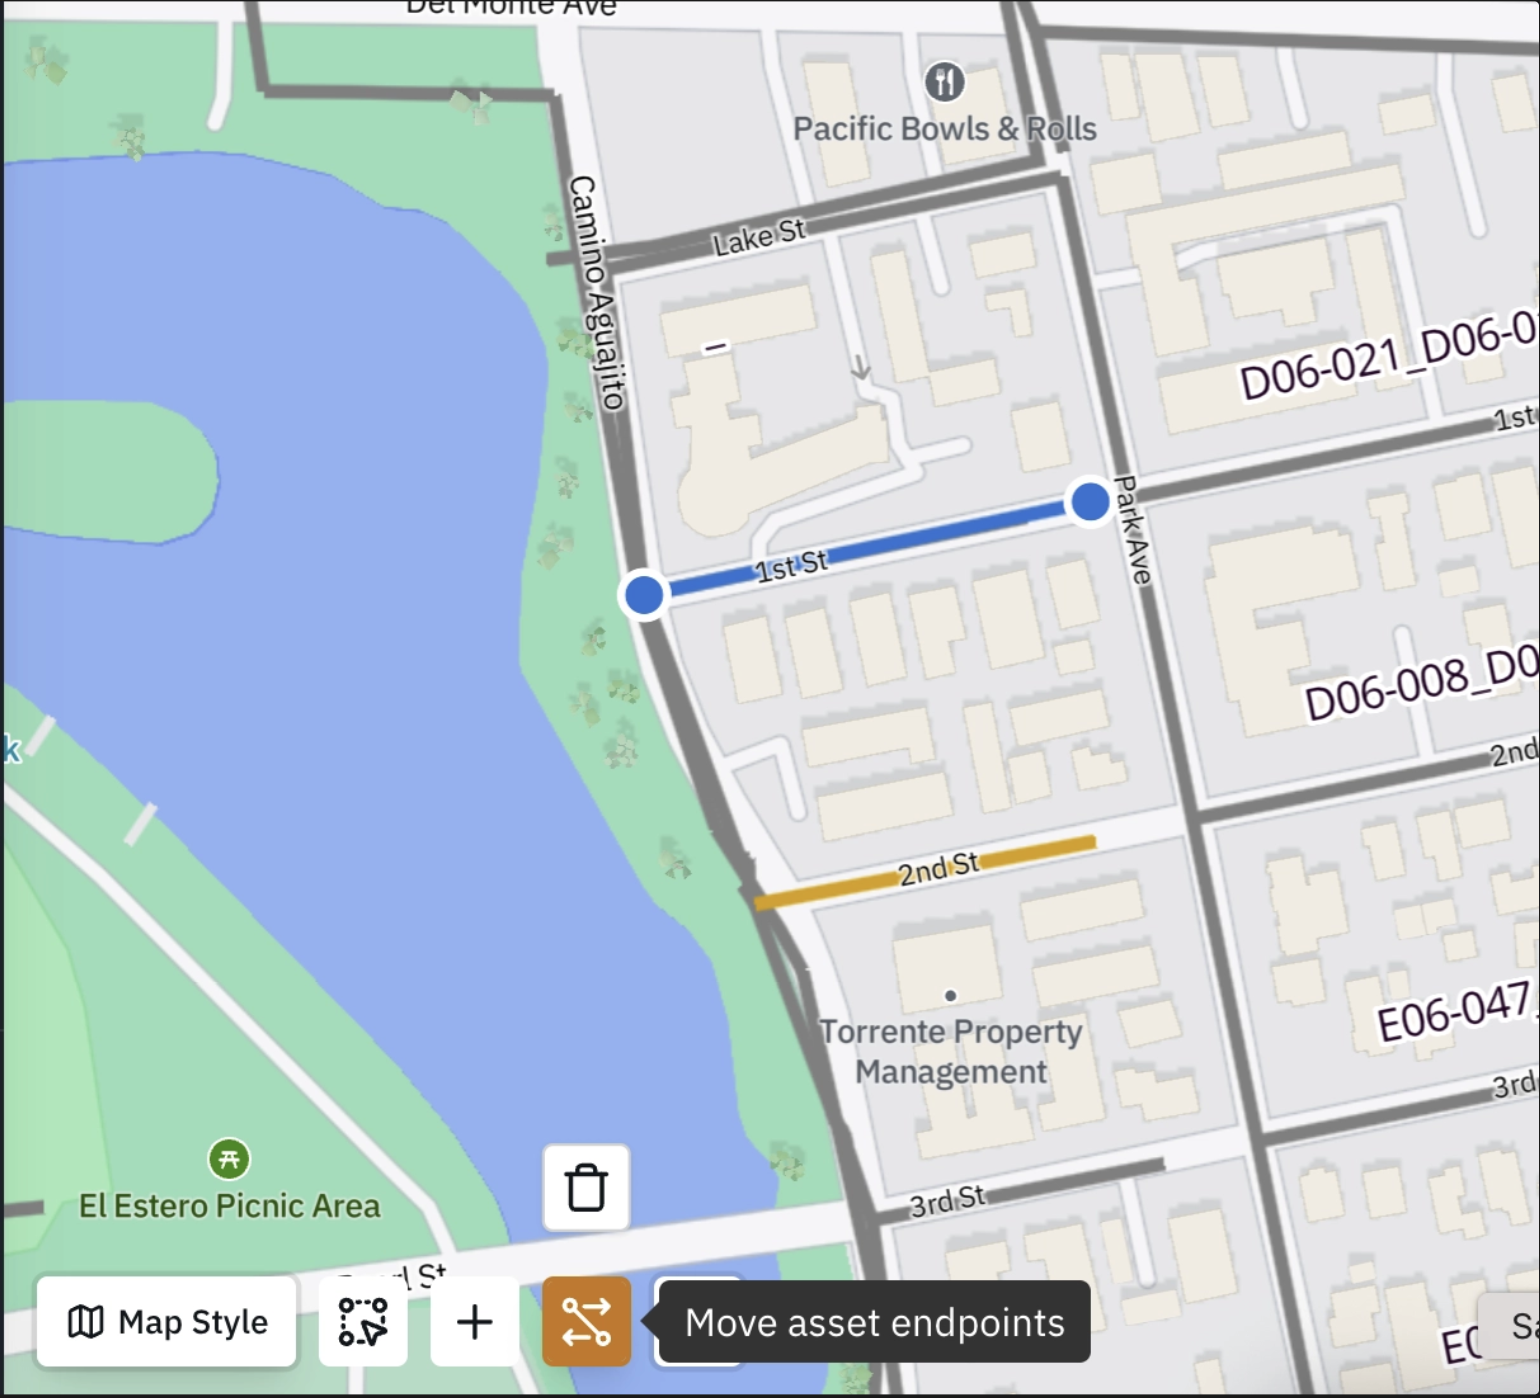
If something is in the wrong spot, move it instead of redrawing it:
Move a manhole to its correct location.
Drag a line’s endpoint, or any point along it, to where it belongs.
Shift a whole line when the entire thing is off.
Cancel to undo the move, or save it. The asset’s other details stay the same.
Step 4: Correct asset details
Select the asset on the map and open its GIS data.
Choose Edit.
Update the ID, material, size, or other fields.
Save your changes.
Editing details doesn't move the asset. Moving it is a separate step, so you won't accidentally change its location. To delete an asset, use the delete action and confirm. It's kept separate so you don't accidentally remove anything.
Step 5: Deliver the map
When the job is done, export the layer as GeoJSON and include it in your deliverable. Your client gets a working GIS map they can load into their own system. That’s a better deliverable, and a good reason for them to call you for the next project.
Need a Shapefile, or want changes sent straight back to your utility’s Esri GIS? Contact your account manager or our support team to see what’s available for your account.
Who it’s for
Contractors who are expected to deliver a map, or who find assets missing from the client’s map
Engineering firms that create or correct asset data for utilities
Utilities that want to add newly found assets and fix their GIS based on what inspections show
Any team working from paper maps, PDFs, or spreadsheets instead of GIS