Fix It Yourself: Unarchive Inspections, See Why a Video Was Rejected, and Change Inspection Type
Last updated: November 17, 2026
Three small Pioneer updates that turn “contact support” into a few clicks.
Pioneer now lets you restore archived inspections, see the reason behind a rejected video, and correct an inspection’s type after upload, all without opening a support ticket.
Fix It Yourself: Three New Pioneer Updates
Some of the most common requests our support team gets are quick fixes: bringing back an inspection that was archived by mistake, explaining why a video was rejected, or changing an inspection uploaded as the wrong type. Now you can do all three yourself in Pioneer.
Find and unarchive archived inspections
Inspections get archived for good reasons, and sometimes by mistake. Until now, getting one back meant a support ticket. Now you can see everything that’s been archived and restore it yourself.
The Inspections page has two tabs at the top: All inspections and Archived. Open Archived to see every archived inspection in your account, with the same columns you already use. To see when each one was archived and who did it, add the Archived column from the column picker.
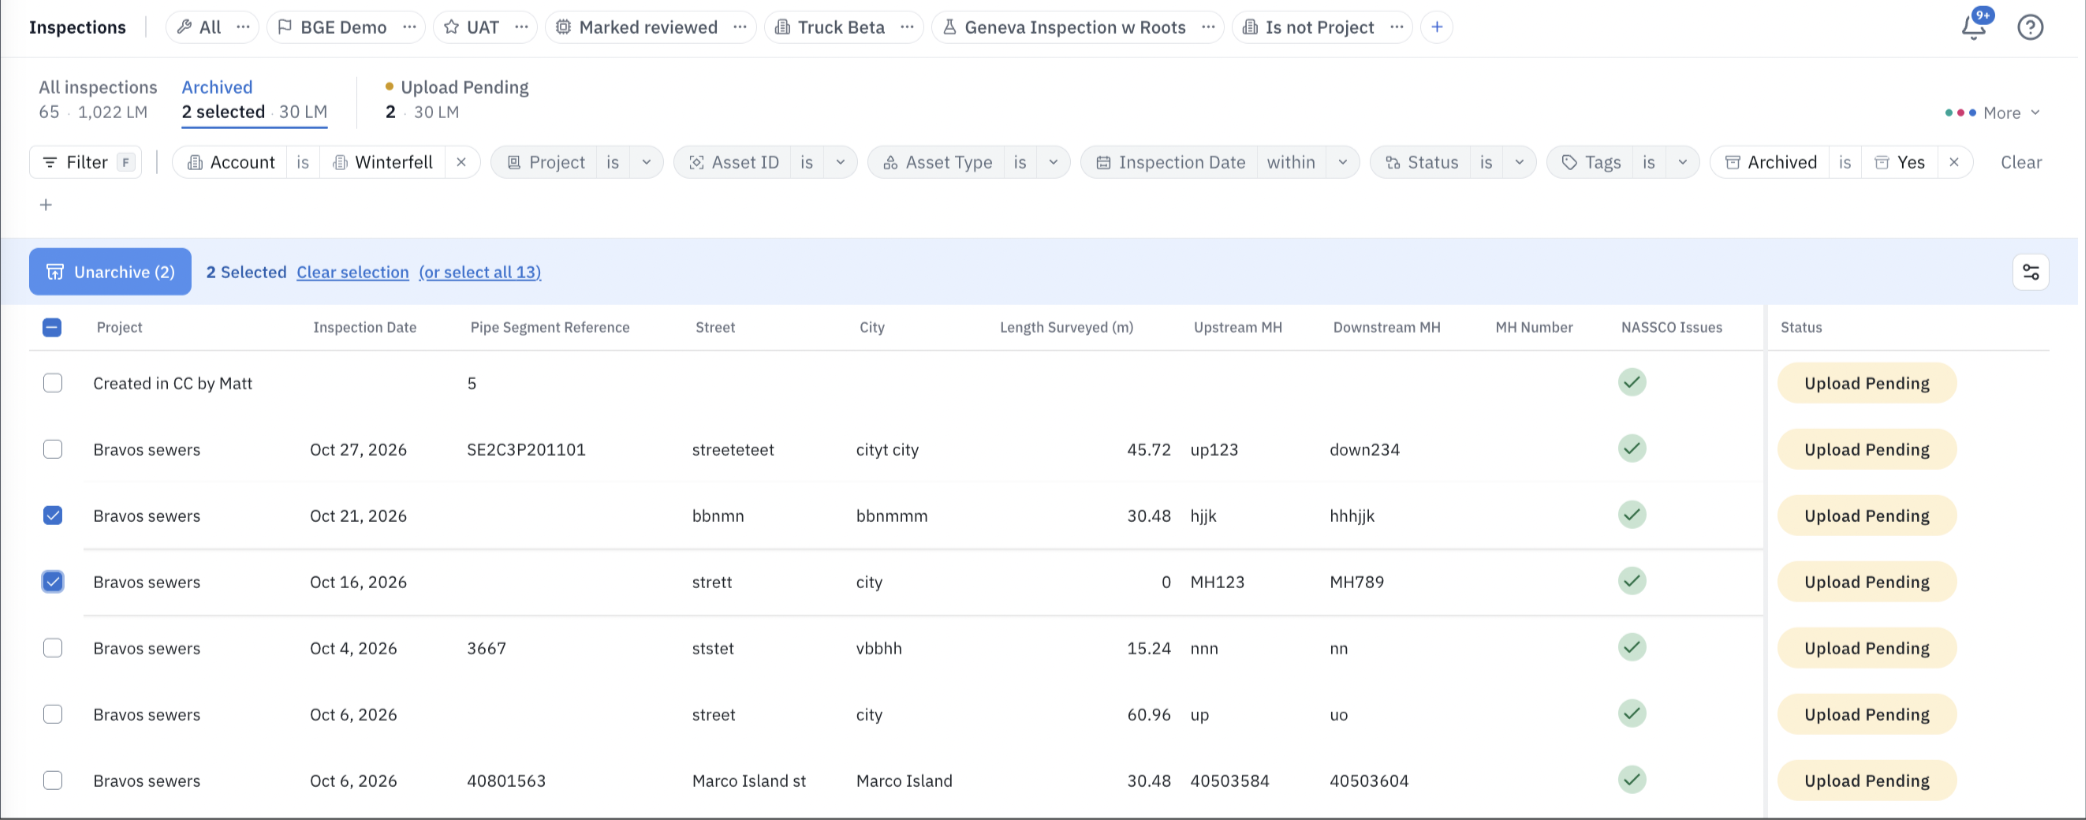
To unarchive:
Go to Inspections and select the Archived tab.
Check the inspections you want to restore. You can select up to 100 at a time.
Click Unarchive in the toolbar.
The inspections go back to your active list right away, and the counts update.
Unarchiving is available to account Admins and Editors. Archived inspections can’t be opened or exported until they’re unarchived.
See why a video was rejected.
A Rejected status used to leave you guessing. Now you can hover over any Rejected status on the Inspections page to see the reason and a plain-language explanation.
For example: “Efforts Exhausted: We couldn’t build a usable 3D model from this video.”
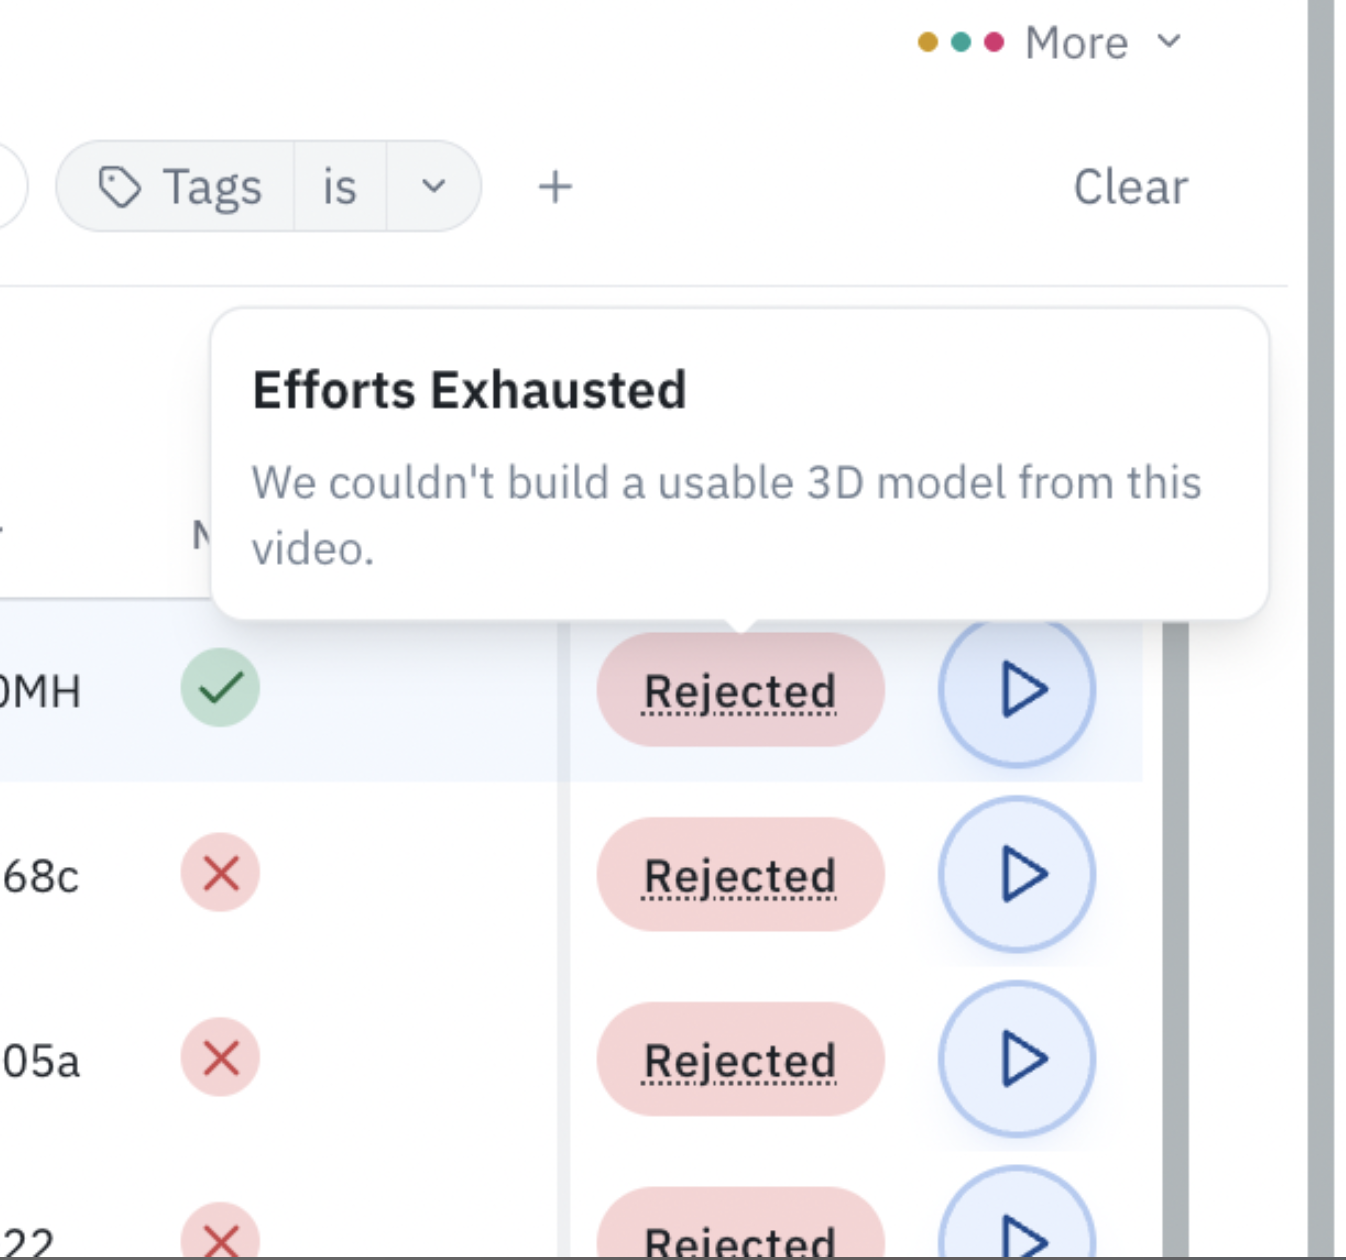
You'll know right away whether to re-record, fix something and re-upload, or move on, without waiting on a support reply.
The same goes for 3D renders. If a render runs into a problem, the status now tells you our team is working on it, and you don't need to take any action. If we can’t repair it, hovering over the Rejected status explains that we tried.
Change an inspection’s type after upload.
Uploaded a lateral as a mainline, or a manhole as a pipe? You can now change the inspection type yourself, as long as AutoCode hasn’t been requested yet.
To change the type:
Open the inspection.
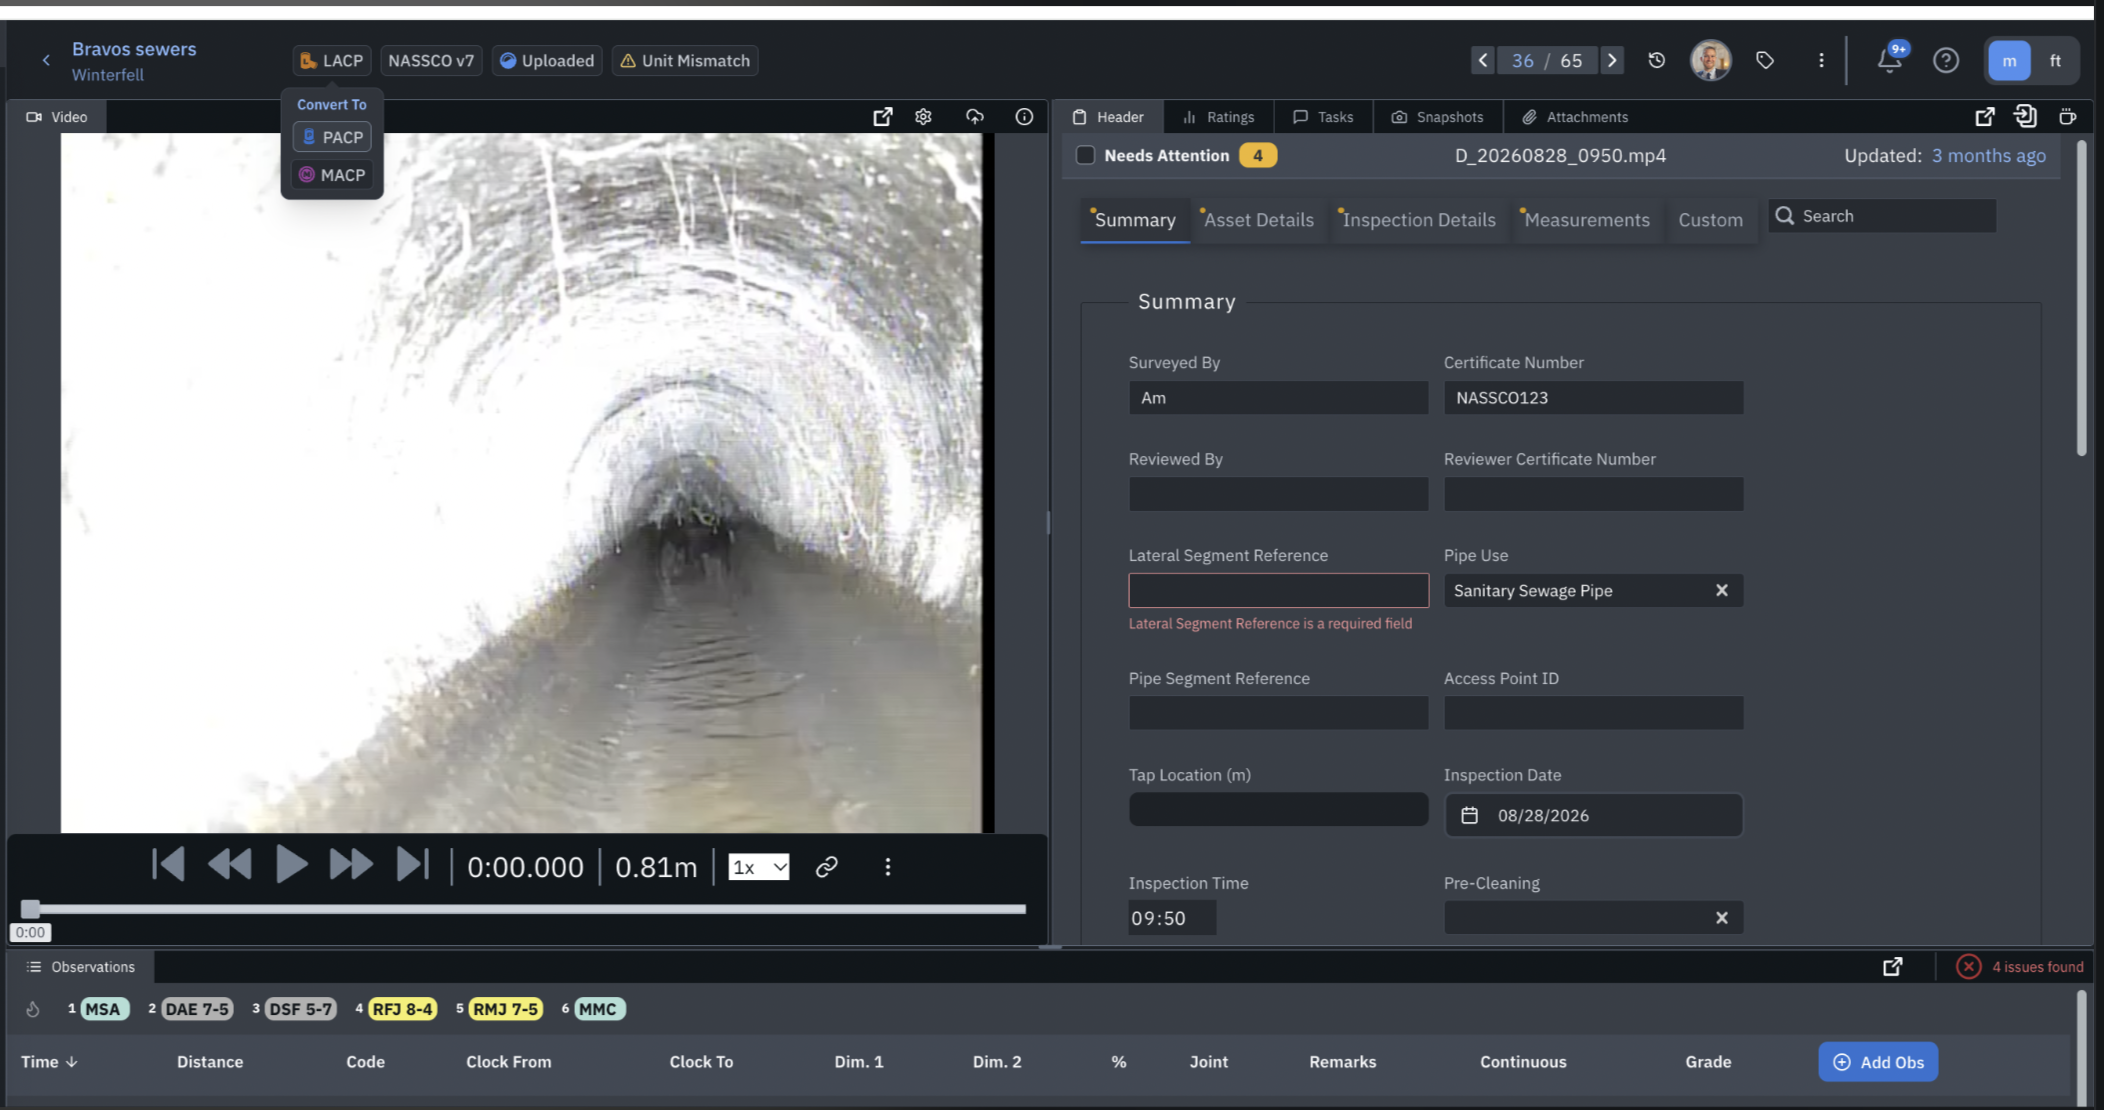
Click the inspection type badge (PACP, LACP, or MACP) at the top of the review screen.
Under Convert To, choose the correct type.
Confirm with Change type.
Good to know:
Review the header afterward. Changing the type changes the label only. The header fields don’t carry over between types, so fill in any newly required fields. For example, a lateral needs a Lateral Segment Reference. Pioneer flags anything missing.
AutoCode locks the type. Once AutoCode is requested, you can’t change the type, and hovering over the badge explains why. To change it, use Request AutoCode Cancellation first.
Who can do it: Uploaders, Editors, and Admins.
Try them out
All three updates are live in Pioneer now. Questions? Use the support chat in Pioneer or email support@sewerai.com.