New in Pioneer: Meet Every Client’s Spec and Log Cleanings from the Map
Last updated: November 17, 2026
Set your client’s requirements once, and log cleanings in a few clicks. Less cleanup between the job site and the deliverable.
Two new Pioneer tools for contractors: apply a client’s spec once and deliver in their format, and log cleanings from the map without setting up records or retyping pipe details.
Project Specifications: Deliver to Every Client’s Requirements
Every city has its own requirements: how files are named, which header fields must be completed, and extra fields beyond NASSCO. Meeting them usually means cleanup and renaming at the end of a project.
With project specs, you set those requirements once at the start. Send your client’s specifications to our support team, and we’ll build a spec for you. Then apply it in Project Settings, and your crews capture the data the right way from day one.
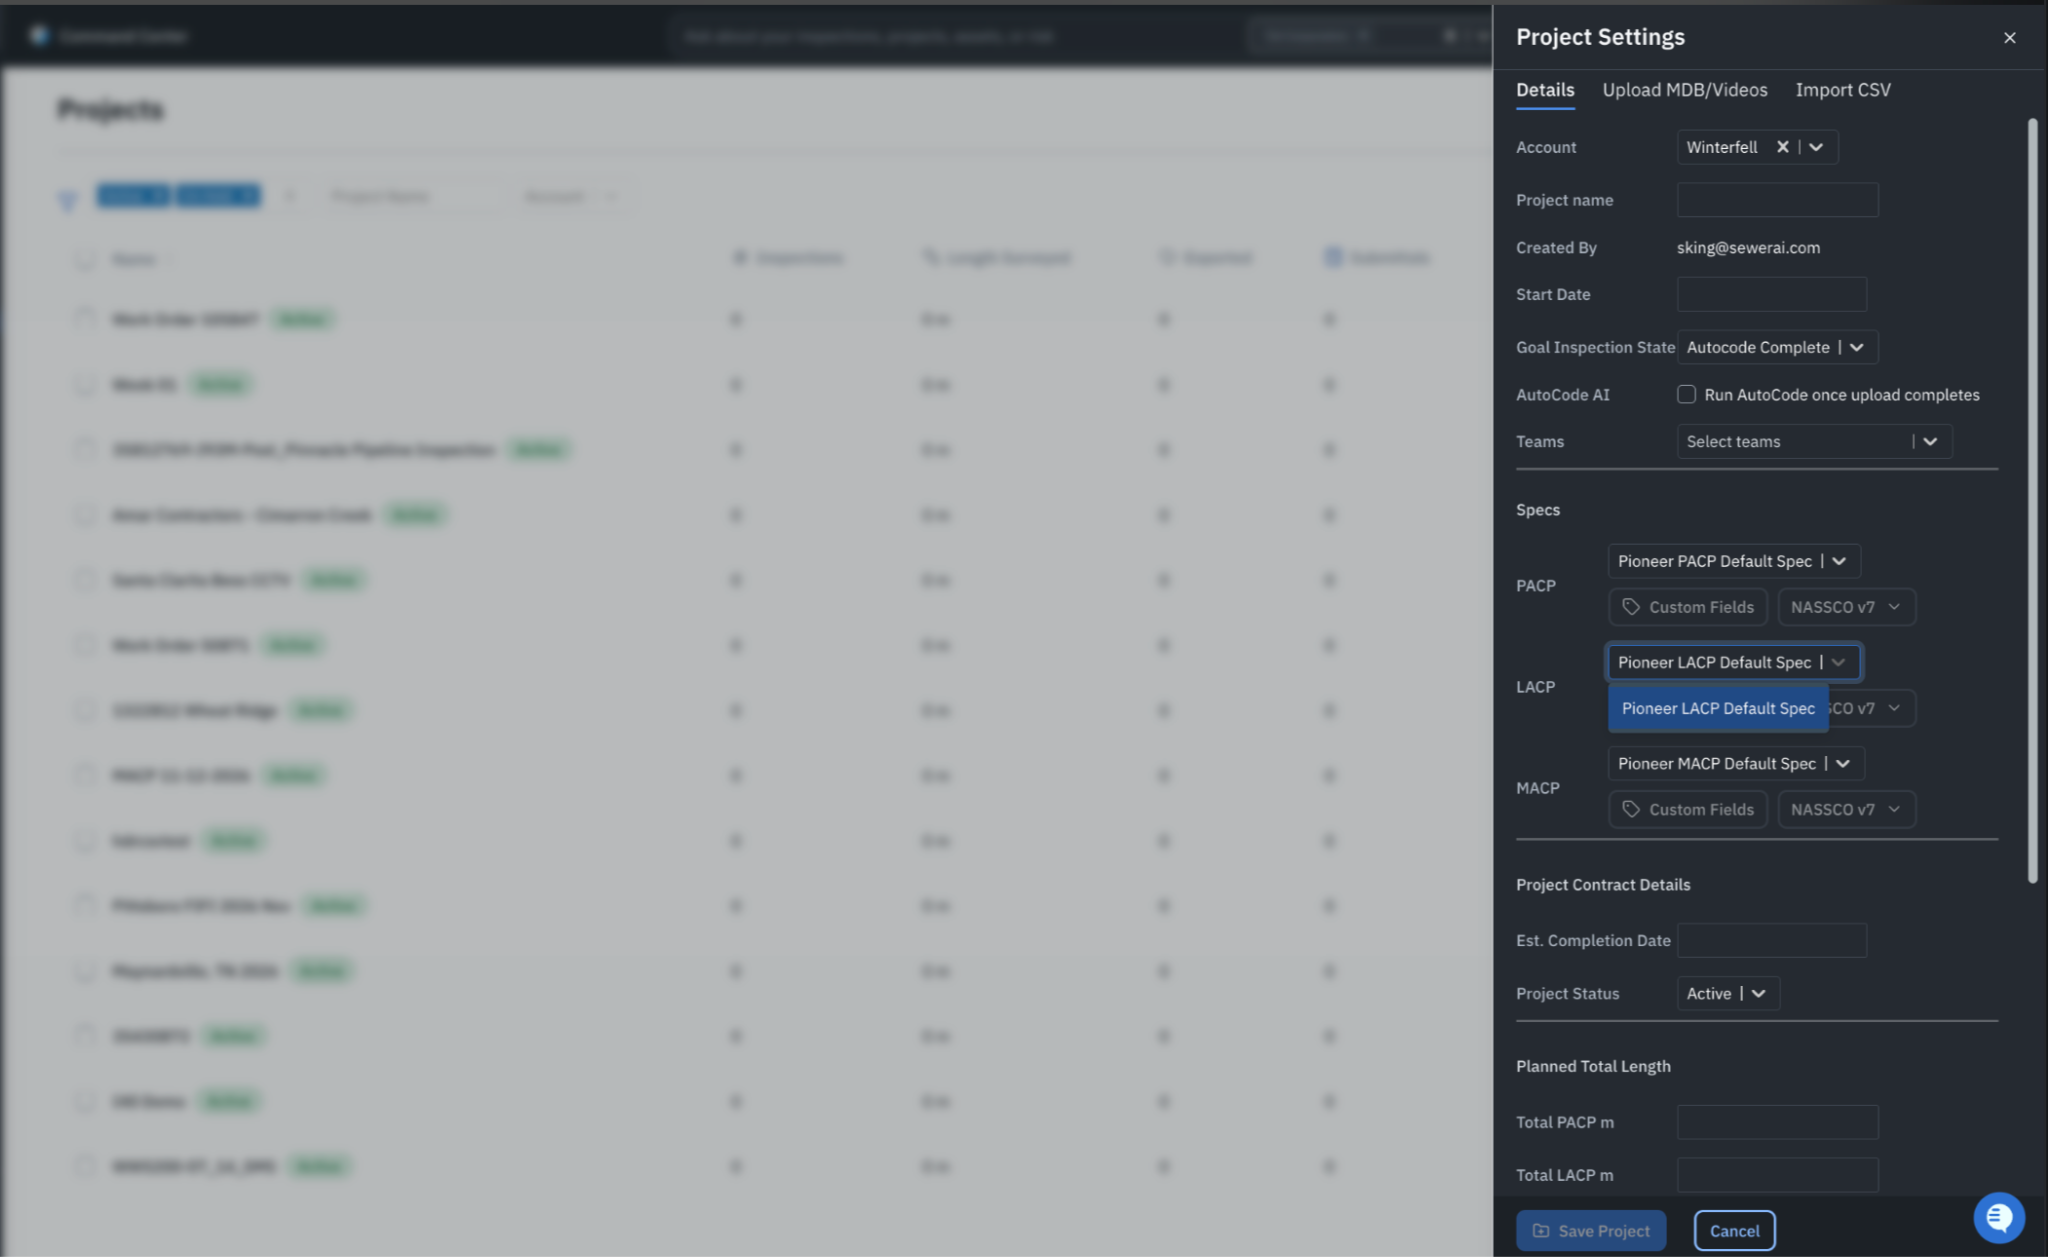
Choose a spec for each inspection type in Project Settings.
We set up file naming for videos, reports, photos, and databases, plus required and custom header fields.
Apply a different spec to each project, and to each inspection type (PACP, LACP, MACP), so every client gets the format they asked for
Exports come out named and formatted correctly, with no reworking at closeout.
How to apply a spec
Send your client’s requirements to our support team.
Once your spec is ready, go to Projects, open the ⋯ menu next to your project, and select Edit Settings.
Under Specs, choose your spec for PACP, LACP, and/or MACP.
Select Save Project, and check that the fields you need appear before work starts.
A spec controls which fields are available or required. It doesn’t fill in their values. To pull asset details in automatically, connect a GIS layer or provide a CSV.
Try these features on your own projects today.
Not yet a SewerAI customer? Try SewerAI on your own jobs for 60 days, with no payment until day 60. [Learn more about the pilot program →]
Already a customer? Contact your account manager or our support team to get started.
Engineering’s notes say that since this summer, customers can also edit file naming through Command Center. Command Center isn’t part of the pilot offer, so I left it out of this roundup. It could be a good line for the newsletter instead.
Cleaning from Maps: Log a Cleaning in a Few Clicks
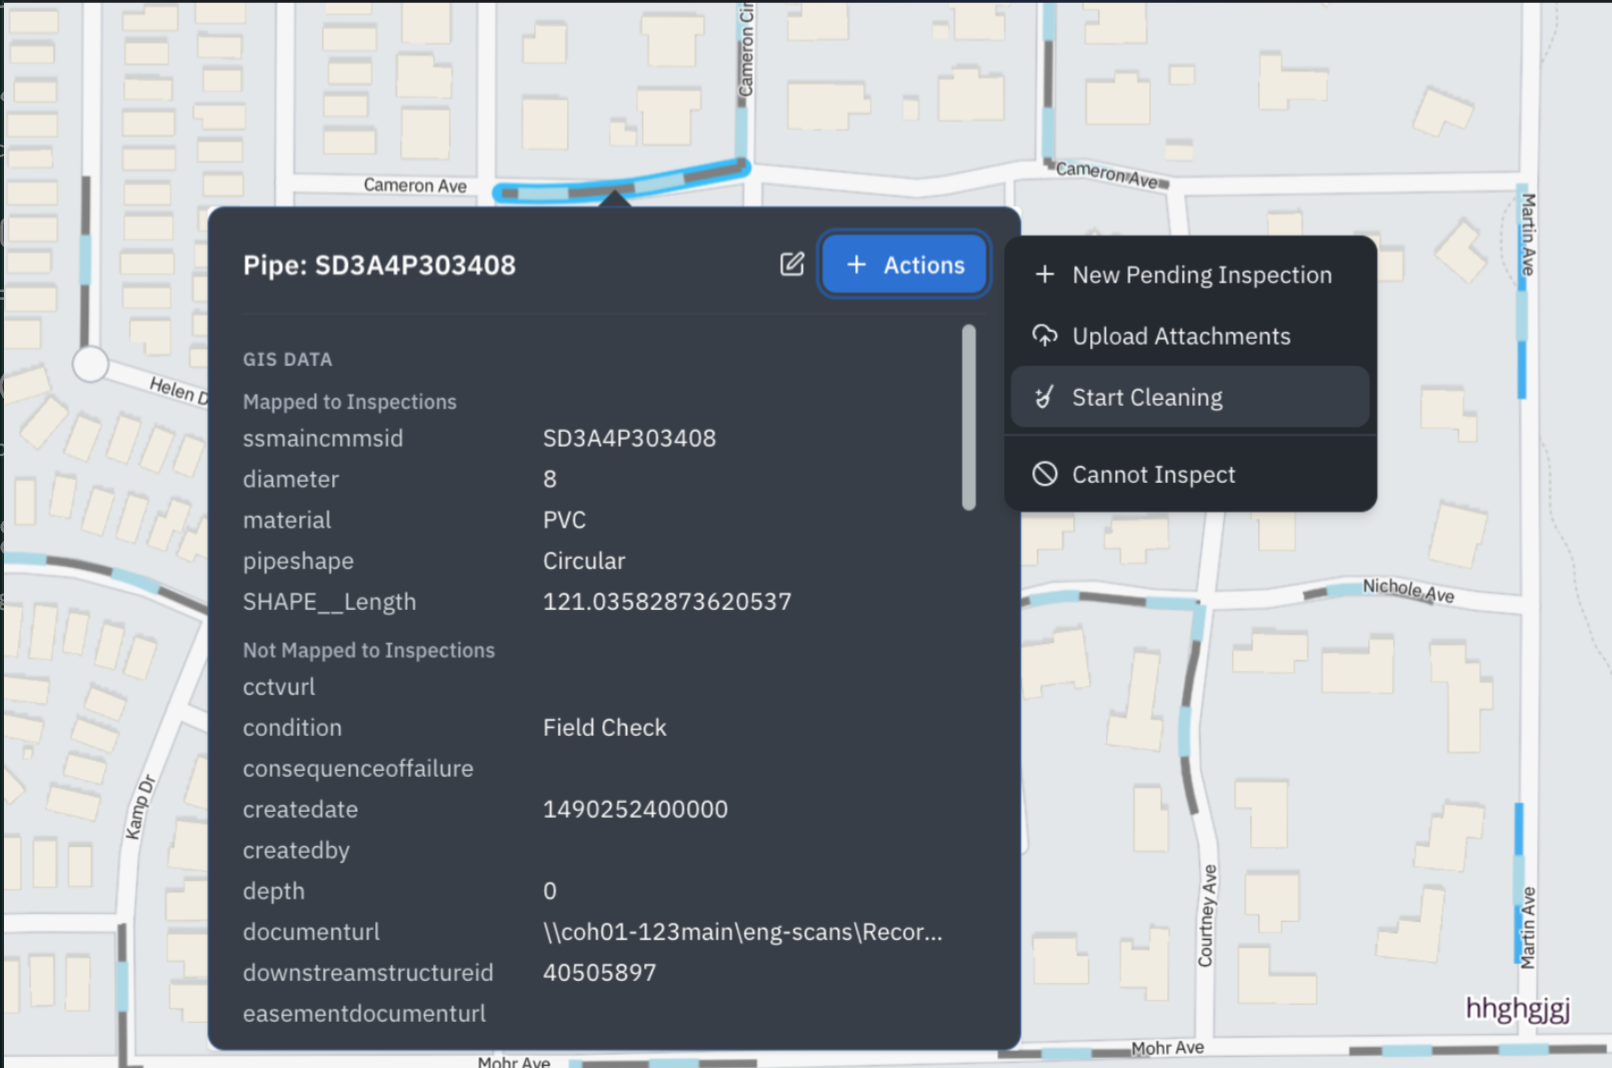
Cleaning crews don’t think in spreadsheets. They think, “Go clean this area.” Before, logging a cleaning meant setting up records in advance or leaving the map to retype pipe details by hand.
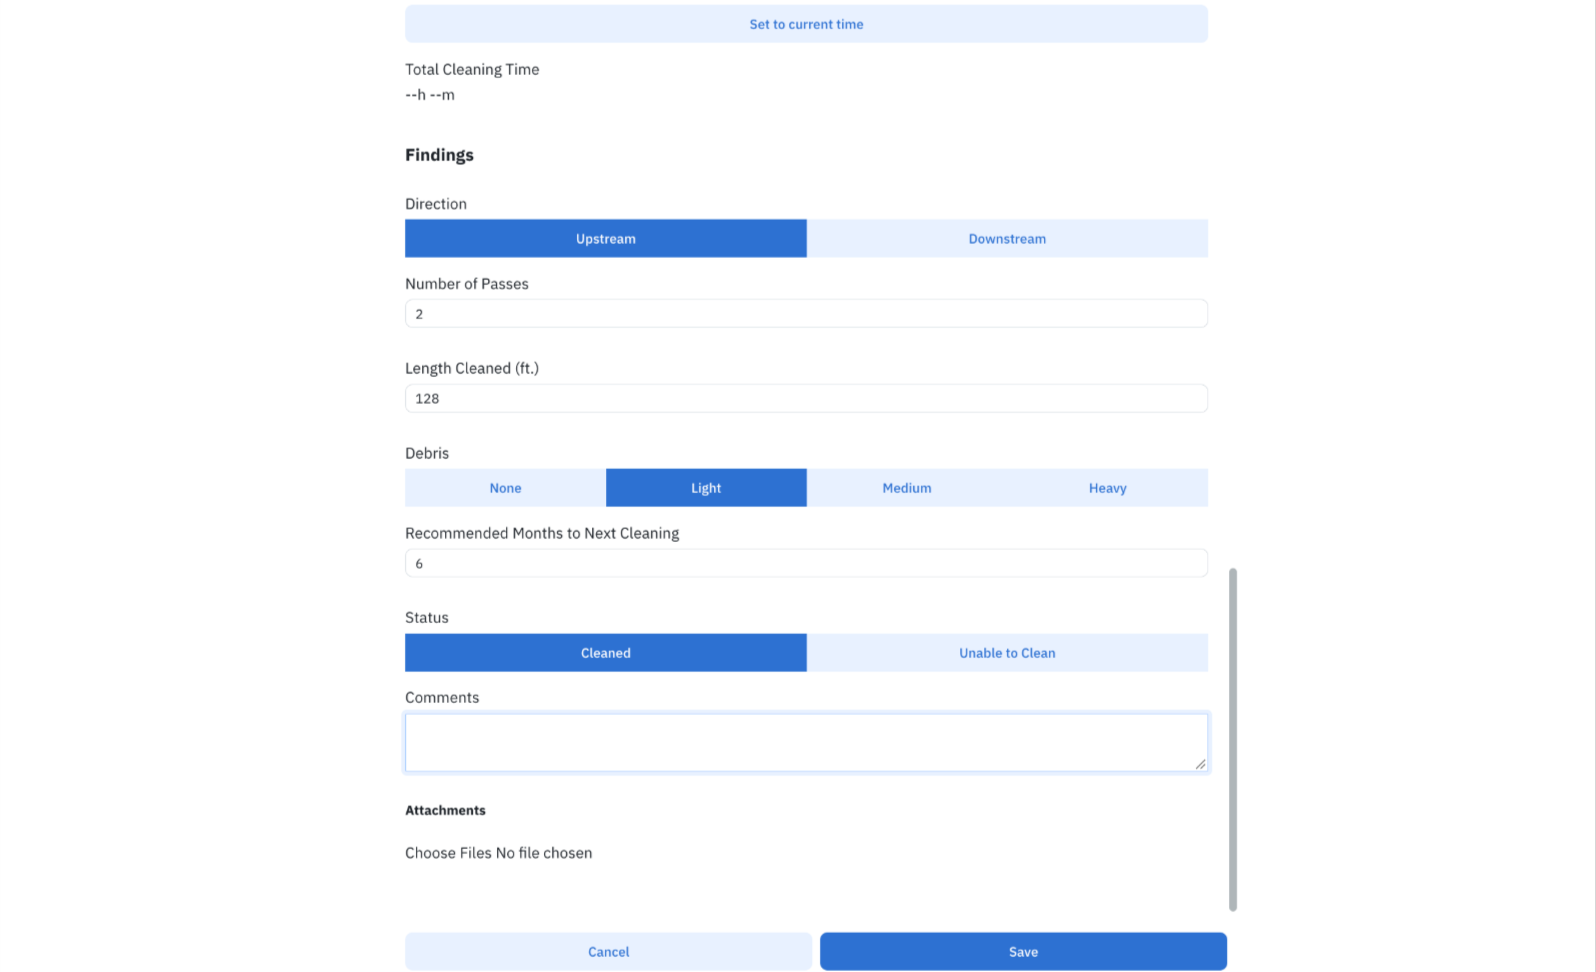
Now your crew can start right from the map. Select the pipe, choose Actions → Start Cleaning, and pick the project. The cleaning form opens with the pipe ID, upstream and downstream manholes, size, material, and expected length already filled in. Your crew adds what they found, marks it Cleaned or Unable to Clean, and saves.
The line on the map changes color as work progresses: yellow when cleaning starts, green when it’s done, and red when it couldn’t be cleaned. Everyone can see what’s finished and what’s left.
No records to set up before the crew heads out
Asset details filled in from the map, with no retyping
Color-coded lines show progress and help prevent duplicate cleanings
Cleanings and inspections live on the same map, so you can show clients exactly what was completed